Showing posts with label Sewing. Show all posts

Monday, 19 October 2015

A Little Sewing Today!

Hello,
I realised today that I hadn't shown you the quilt I made for Zack over the summer holidays. If you follow me on Social Media (links at the end of each post) you would have seen this project but I really wanted to share it here and add a few more pictures of this very basic, but fun quilt I made for my youngest. I am certainly no expert sewer and it's definitely not perfect but I really did enjoy making this quilt and I was happy with the end result. I do have a few more projects lined up, cut up and some even half sewn! I'm not quite sure I'll get much more done in the next few weeks though with everything else going on :-)
Anyway, let me show you the quilt. It's a standard, single bed size...
 I purchased Moda 10" pre-cuts and Zack wanted a bright selection (rather than a limited colour pallette as I would have chosen :-)) but it is quilt so he got to choose, of course!!
 I added turquoise binding.
 I'm not experienced/good enough to do free motion quilting, which I adore the look of, so I compromised and quilted it with random wavy lines on my standard machine. I was happy with the end result :-) and the green coloured backing is practical (for washing/making tents?) whilst giving it a pop more colour too.
 But, most important of all, Zack was pleased with his quilt!
So, I hope you have enjoyed this different kind of a post from me today? I will be back tomorrow with another card and a video to go with it, 
'till then,
Here is the Online Shoppers Code for use this October. Please use this code when shopping in my Online Store and spending between £25 and £150 for a free thank you gift after the end of the month. If you spend over £150 you will earn your own fabulous rewards :-)
ZNZFZYAN
Stampin' Hugs,

Saturday, 22 August 2015

I'm Back! With a Little Sewing - My Picnic Blanket

Hello!
Long time, no blog! Well, a week anyway ;-)
I have had a few, lovely and well needed days away with the family in London (the magnum ice cream shop in Covent Garden was awesome!! check it out on my Instagram feed), a fun day at Chessington World of Adventures on the roller coasters and then a day in beautiful Brighton looking at the cool shops and cafes, finishing with dinner at the most amazing mexican restaurant La Choza, I can highly recommend the food and the service was wonderful too :-) It was just a lovely time spent together :-)
So, after that brief update I am back to blogging and have a ton of card-y things to share with you over the next few weeks, but tonight I want to share with you the picnic blanket I made a while back for this "summer". Sadly, said summer has still not really happened in the UK and we are fast running out of time :-( But, I have this nice, thick blanket- all ready for when it is dry.... one day.... :-)
So, to make this blanket I used a layer of thick blue fabric for the bottom sewing on a layer of thin, warm fleece at regular intervals and then sewing the bottom pieces to the top piece of fabric (right sides facing) before turning it the right way round (sewing it closed), and adding a stitched border.
Sounds easy right? And it is if your top and bottom fabric is the same size but my blue fabric was wider and shorter than the top so it took waaay longer than it should have! But I love it! So it was totally worth it!
The top and bottom really didn't need sewing together as there is no wadding as such, however I had these cute, felt pieces from many SU! catalogues ago and I thought they would look super cute sewn randomly over the banket top and having the dual purpose of holding the top to the bottom :-)
As a late addition I added a little pocket to the back to hold the ribbon ties in whilst it's unrolled and in use. No chance of tripping over those now!
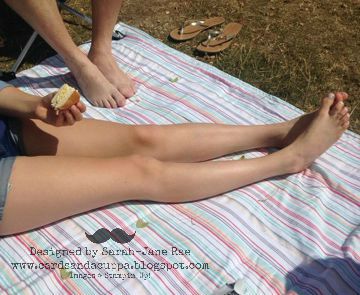
And Zack demonstrating the blanket in the back garden for the photo shoot! Lol!
and here we are (Zoe and the hubster) on one of only two days at the beach so far ;-)
Because I added the thin fleece layer inside it's super thick and perfect for laying out on and not having any of those pesky sharp stones digging in you :-)
(sorry this pic is not great as it was from my phone)
So, there we have it!
I hope you have enjoyed tonights post? A bit of a change from me but I have really enjoyed making time to sew some this summer :-)
But, I have a ton of paper craft projects to share with you now too some using new Christmas Catalogue items!! Whoop, I love Christmas :-) If you would like a FREE copy of the new Seasonal catty please drop me a line. Remember: if you have ordered with me in the last few months I will be sending you a copy but if you chose "No Contact" when checking out I don't have your details so please message me and I'll make sure you get a copy :-)
OK, This has been a much longer post than I thought to start with as I just have so much to tell you!! So I hope you are still with me??
Thanks so much for stopping by today,
Stampin' Hugs,

Wednesday, 28 January 2015

Table Top Quilted Camera Bag

Hello,
I do have something crafty to share with you today but just for a change I tried my hand at a little sewing recently. Now, I don't sew a lot so please be gentle - I'm certainly no expert!! but I did enjoy myself, I must admit ;-)
What I wanted was a quilted bag for my new camera to sit in when I'm in my craft room working. I often take a picture when I place things on a card before I glue them down and of course I do those little tutorials for you guys on here too! So I needed something small-ish and not too bulky to protect my camera from glue and knocks in my craft room while it was on my desk but that would make it still easy to get to at the same time.
I imagined a little quilted, open top bag but as I had never quilted anything, ever (!) I watched a couple of fab videos on You Tube by The Missouri Star Quilt Company. Jenny there explains things so well. I watched how to make a bag and a pin cushion then designed this camera bag using a few of her tips. Take a look...
 Now, I know it's not perfect - but it is pretty ;-)
 I picked this pretty fabric up in a shop in Salisbury while visiting with my friend Laura
At the bottom of the bag I double layered the batting and sewed wider strips so it had more "bounce" to protect the camera when popping it in the bag.
 And it's just prefect for my little camera, I use it all the time!
Well, I hope you have enjoyed today's something different?
For sneak peeks of projects I'm working on, in real time, please consider following me on Facebook, Twitter and Instagram, all links below :-)
I'll be back tomorrow with a card and a tutorial to share with you.
Thanks for looking today,
Stampin' Hugs,
Related Posts Plugin for WordPress, Blogger...