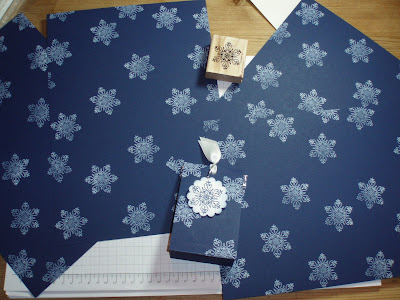
Good Morning and Welcome to my little tutorial for this Sweet Holder....
I used these on Saturday as gifts for the lovely ladies who attended my Christmas Bags and Tags class, I am also making another 11 for table gifts on Christmas Day in the same colourway, more of that later though.
I have made this tutorial using cream instead of the navy card so it is easier for you to see the score lines in the piccies.
Here we go :0)
To make this sweet holder you will need the following; A4 card, paper trimmer or craft knife, a score board or scoring blade for your trimmer, pencil, ruler, small bags (I used SU! small cello bags, only £2.75 for 50 and perfect size, see page 80), a stapler, strong tape, and of course decoration of your choice,
First thing to do is to mark and cut along the shorter edge at 7 and 14 cm, this will give you 3 holders from 1 piece of card stock.
TIP: If you are stamping to decorate your holders then now is the best time to do this, before you go onto the scoring part ;0)
Next is to score at 1/2 A4, then I take the grove next to it which is the 5"square line and score down this, rotate your card stock and score on the other side again on the 5" line {if you are using a score blade it is about 2.2cm or 7/8" from the centre score line,} this is what it should look like.
TIP: if you are making lots like I am for Christmas you could do the scoring part first and come back and do the cutting after, this way is great for making just 1 or 2.
.JPG)
Next turn your board over to the box side and score on the first line in, rotate card and do the same on the other end, {for trimmers it is approx 1.6cm or 1/2 inch in from the edge,}
Right so that's your scoring done, I have filled my bag, (perfect for 3 celebrations I found!) folded it over and stapled the top, I added strong tape to the top of the card like so, stick the bag to the tape, fold it up together and voila! all that's left to do is seal the top together however you fancy, look HERE for some more ideas (I made these ones for convention)
TIP: If you want, you can also use a little tape on the top left hand fold, to keep it still while you punch or add your tab.
And finally here are mine all stamped up ready to be scored and cut for the table at Christmas,
I hope you liked my tutorial, please do leave me a comment and let me know if you could follow it :0) and if you do have a go (and I really hope you do!) send me a link so I can have a look, I would love to see your creations,
Thanks for visiting, Hugs Sarah-Jane xxx

.JPG)
.JPG)
.JPG)
.JPG)
.JPG)

Fantastic SJ! I will have a go! Jules x
ReplyDeleteThanks for the tutorial. I'll be having a go at these.
ReplyDeleteVery cute project! Someone is lucky :)
ReplyDeleteWowww Sarah-Jane,what beautiful.
ReplyDeleteHugs Riet.x