Saturday 31 January 2015

Stampin' Up! Lotus Blossom Sale-a-Bration set with Silver Vellum

Hello!
Today's card is a direct case of THIS CARD I made and shared with you a couple of weeks ago. I loved it and decided to try it in a couple of different colours combos. I used the fabulous FREE Lotus Blossom Sale-a-Bration stamp set which uses a 3 step stamping technique to achieve this look.
I'll start today with the Bermuda Bay ink with Retro Fresh Washi tape accents on a Silver Foil Vellum layer, take a look...
 And here I made a Rose Red Lotus Blossom with Silver Bakers twine around the top to decorate
 and here are all three together! Do you prefer the Gold or Silver Vellum? I'm loving Gold (everything) myself right now ;-) but these silver spots are sooo sweet....
OK, short and sweet today as I'm off to work in a mo.
Thanks for looking today and if you have any questions about Sale-a-Bration or how to get your own Lotus blossom stamp set please drop me a line ;-)
Stampin' Hugs,
Products Used to create this project:

Thursday 29 January 2015

Love Is Kindness by Stampin' Up! coloured with Blendabilities and a FREE Artisan Label Punch Tutorial

Good Morning!
I'm back today with another Love is Kindness card. I coloured this in over the weekend using my Blendabilities but this time I used the Wisteria Wonder pens along with the Wild Wasabi and Smoky Slate.
I also used some more of the free Sale-a-Bration paper Irresistibly Yours but this time I only added ink (using a dauber) behind the flower image after I "fussy cut" it, it makes for a totally different look (to Mondays card, HERE) don't you agree? ....
See the sponged background? I like this look for this paper, it's nice and subtle  :-) and I also tied a bit of Linen Thread around the paper wrap for some extra texture ;-)
 As I showed you in Mondays post I cut away the sentiment on this stamp so I could use it away from the main image. It really is a lovely one though so I definitely wanted to use it for this card.
Did you notice how I layered the sentiment using the Artisan Label Punch? Cool! Because I have a tutorial on how to do this coming right up!
 So, I think they are pretty self explanatory but if you have any questions please do add them in the comments :-)
Part One, with a flat top as used on this card...
 And Part Two for a whole Label Layer
1. On the centre punched layer, repeat the trimmed areas on both sides, I left one whole to show it was just cut in half up the centre ;-)
Well, I hope you have enjoyed today's card and tutorials?
And I'll be back tomorrow with another card to share with you.
Thanks for looking today!
Stampin' Hugs,
Products Used to create this project:

Wednesday 28 January 2015

Table Top Quilted Camera Bag

Hello,
I do have something crafty to share with you today but just for a change I tried my hand at a little sewing recently. Now, I don't sew a lot so please be gentle - I'm certainly no expert!! but I did enjoy myself, I must admit ;-)
What I wanted was a quilted bag for my new camera to sit in when I'm in my craft room working. I often take a picture when I place things on a card before I glue them down and of course I do those little tutorials for you guys on here too! So I needed something small-ish and not too bulky to protect my camera from glue and knocks in my craft room while it was on my desk but that would make it still easy to get to at the same time.
I imagined a little quilted, open top bag but as I had never quilted anything, ever (!) I watched a couple of fab videos on You Tube by The Missouri Star Quilt Company. Jenny there explains things so well. I watched how to make a bag and a pin cushion then designed this camera bag using a few of her tips. Take a look...
 Now, I know it's not perfect - but it is pretty ;-)
 I picked this pretty fabric up in a shop in Salisbury while visiting with my friend Laura
At the bottom of the bag I double layered the batting and sewed wider strips so it had more "bounce" to protect the camera when popping it in the bag.
 And it's just prefect for my little camera, I use it all the time!
Well, I hope you have enjoyed today's something different?
For sneak peeks of projects I'm working on, in real time, please consider following me on Facebook, Twitter and Instagram, all links below :-)
I'll be back tomorrow with a card and a tutorial to share with you.
Thanks for looking today,
Stampin' Hugs,

Tuesday 27 January 2015

Lotus Blossom Sale-a-Bration stamp set by Stampin' up! with Washi Tape

Hello!
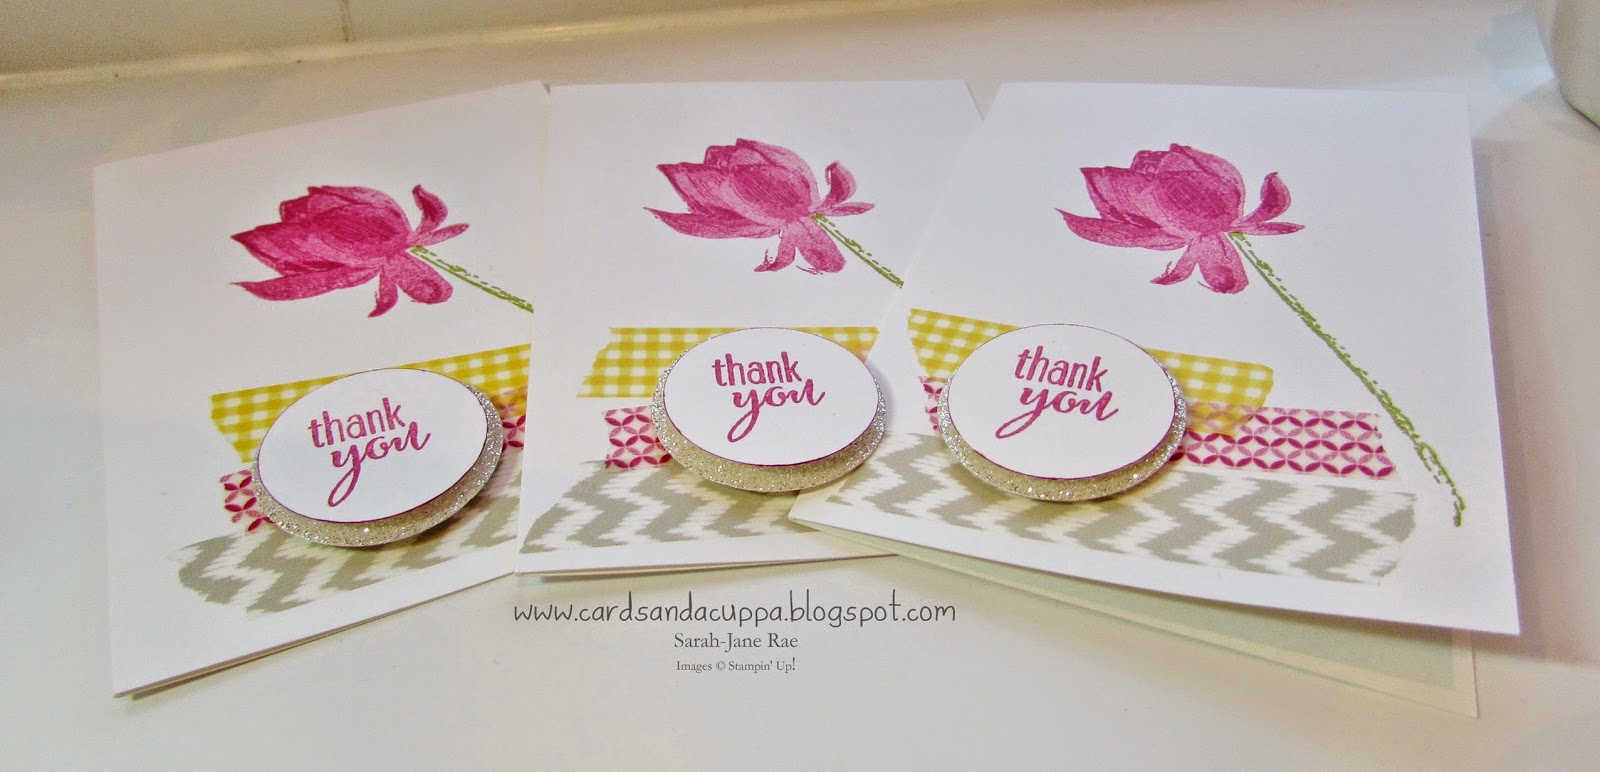
I've got a set of quick and pretty notecards to share with you today using the Sale-a-Bration Lotus Blossom stamp set which is just lovely! It's a 3 step stamp which means there are 3 layers to stamp to make this flower image look so pretty! It's really very versatile and is great fun to use too.
I needed some Thank-You cards this week for customers so I decided to have a little play about with this set to make these cards...
 This set comes with this sentiment. The bottom Sahara Sand Washi tape is from the Sweet Dream Washi Tape pack but the other two  are unfortunately retired. You could use the Beach House Washi instead though and these are in the Weekly Deals 'till 11pm tonight and are just £3.38 'till then!
 I stamped the lovely flower in Rose Red with an Old Olive stem
 This is a simple single layer card but I popped the sentiment on dimensionals on top of silver glimmer paper circle
 and here are a few together
Right, that's all for today.
I'll be back tomorrow with a sewing project :-)
Thanks for looking today
Stampin' Hugs,
Products Used to create this project:
Related Posts Plugin for WordPress, Blogger...