Showing posts with label Christmas. Show all posts

Sunday, 16 December 2018

Easy Ombre Card with Beautiful Blizzard by SU!

Hi there!
I have a card from class to share with you today that I totally love!
Plus, this was a super easy card to make! Winning :-)
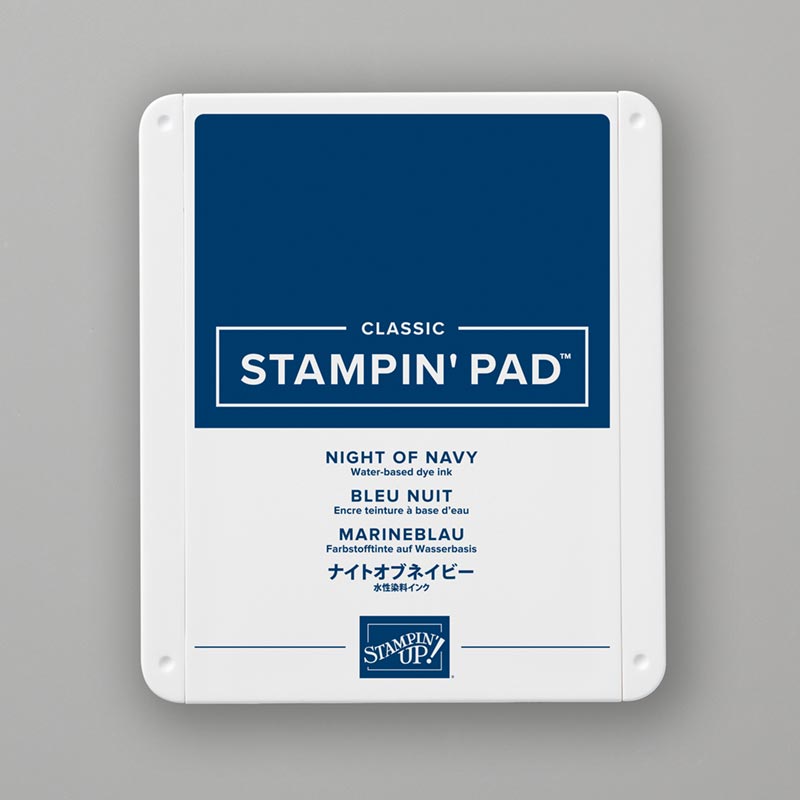
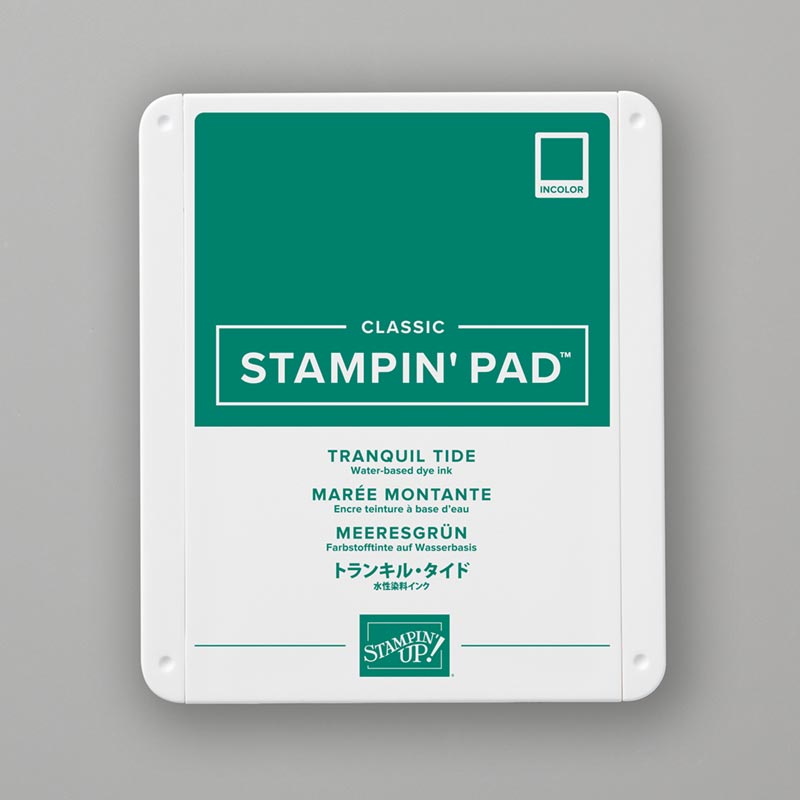
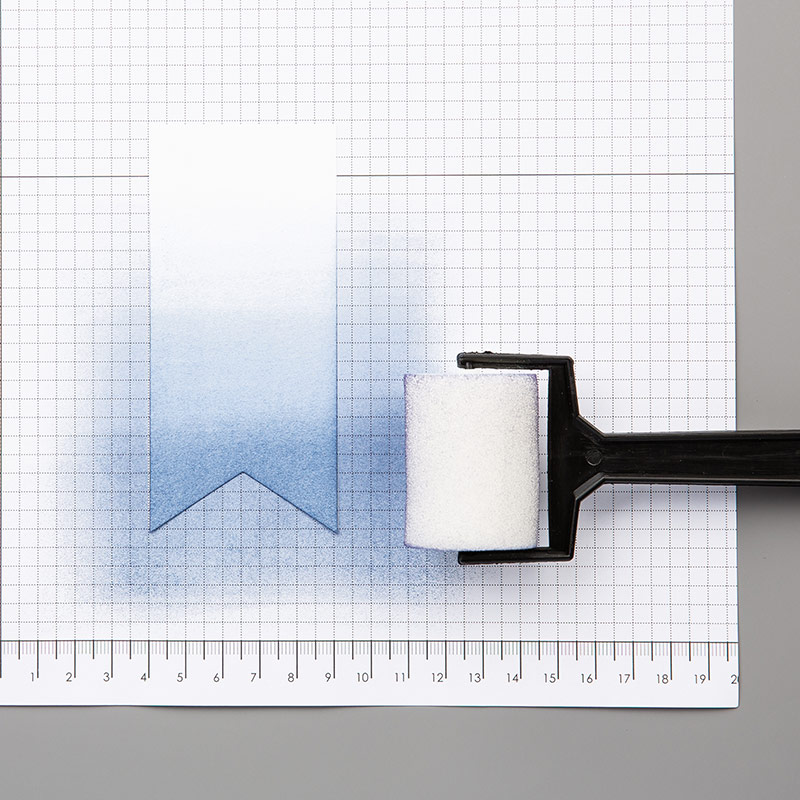
I used Night Of Navy ink at the top and built up the colour using a sponge brayer on white shimmer card before adding Tranquil Tide at the bottom to create the ombre effect. Then we dropped water onto the inked piece and dabbed it away before adding a sprinkle of shimmer paint onto the coloured card layer.

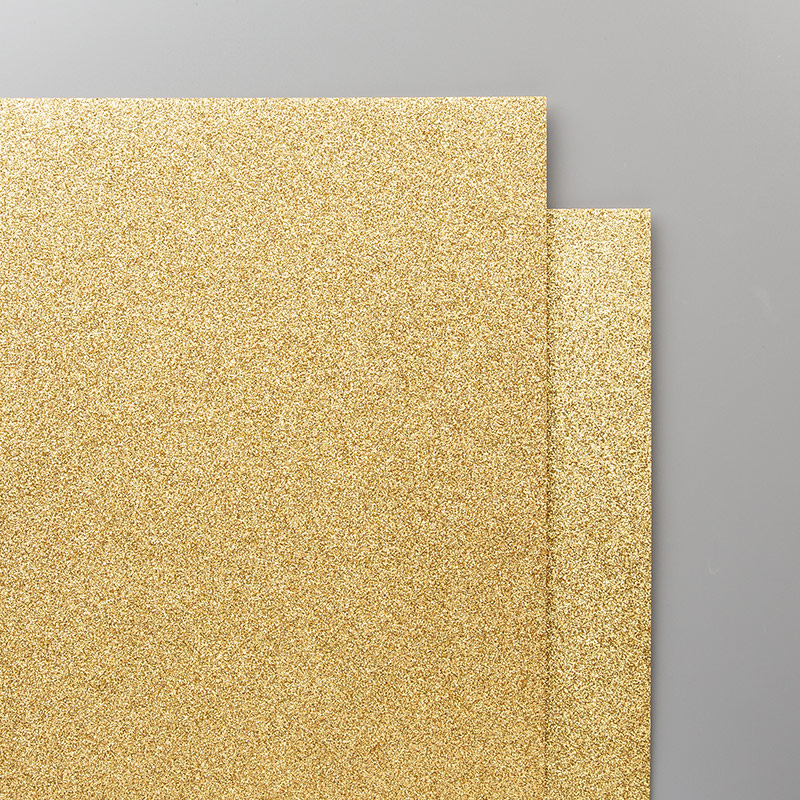
I adore the impact these two colours make together and even though they are not necessarily traditional Christmas colours I think with the gold snowflakes they work well...
Top with some gold glitter snowflakes and a sentiment and that's it!
This card was really popular at class and my ladies were all surprised how easy it was to make.
I plan on recreating this card with a spring feel to it, what do you think?
Anyway, that's all from me for today, I'll be back soon with more Christmas creations.
'Till then, happy stampin'
      Shop Online With ME! 
Host code for December spends over £25 and under £150 is UH9TAFNK
Stampin' Hugs,

Wednesday, 28 November 2018

Merry Winter Woods for Inspire. Create Challenges

Hello and welcome to another challenge with Inspire. Create!
We have a super fun challenge that anyone can join in with as its "Anything Goes" so let your imagination run wild or simply enter any new card you make this week or next, it's entirely up to you* Check out the DT's makes for lots of fun ideas HERE
So, are you still making Christmas cards? Or maybe you're onto wrapping now
*some simple guideline apply :-)
So, I decided to use the Winter Woods bundle teamed with a sentiment and some adorable little stars from the Farmhouse Elements to make this fun card...
The background paper is from the All Is Bright DSP pack
and a thin strip of glimmer paper adds some (always needed) bling...
I used my markers to colour the two tone image and I'm hoping to get a little video of a similar card made this week so keep an eye out ;-)
So, that's my make for today, We'd love it if you had a go at our challenge and now is the perfect time to try as anything new you make can be entered! Go, go, go!
Thanks so much for looking today and remember to check out the DT's makes HERE for inspo.
Back soon with more :-)
Shop Online With ME!  Host code for November spends over £25 and under £150 is  UATQ2BWV
Stampin' Hugs,

Saturday, 24 November 2018

Stretch Your Christmas Supplies Further, Class Card. Hearts Come Home stamps and dies.

Hello there,
How are you doing? Are you ready for Christmas yet? I have quite a lot done but I'm sure there's loads I've forgotten, still to do :-0
OK, so I ran my last class of the year last week and as I find that I tend to put away a lot of my Christmas stash after the main event but I wanted to share that perhaps you shouldn't automatically do that.
So this week's class was designed to show how you can stretch your Christmas supplies further.
*EDIT: TO SEE ALL THE OTHER CARDS IN THIS SERIES, GO HERE*
 I started with the Hearts Come Home stamps and die set to make both a Christmas card and also a  New Home card, see...
 So, here's a closer look at the Christmas version. This is the more typical card you would imagine making with these dies. I also used some of the bokeh paper from the Christmas 'All Is Bright' DSP pack which I stamped with the snowflake from Beautiful Blizzard using matching coloured ink.
 Of course I added a heap of Dazzling Diamonds glitter to the houses and along the top edge because well, it's Christmas! Sentiment is from the coordinating Hearts Come Home stamp set and I layered both cards with some Coastal Cabana card under the Sahara Sand paper layer to give it a little pop.
 So, onto the "non-festive" card, made with the same supplies, give or take.
I used the same paper from the All Is Bright DSP pack but didn't stamp over it this time, simply adding the Hometown Edgelits die cut houses across the bottom again. I also added a crumb cake house to the top of one and covered it using the fine tip glue pen to create a glossy finish to highlight the house.
I adhered the Hometown Edgelit die cut using Tombow glue, which is such a great adhesive as once it's stuck it's not going anywhere but you still have wriggle time to get it right in the beginning. 
This sentiment is from the "At Home With You" stamp set and a few sequins from my stash.
So, what  you think? Have I inspired you to keep your Christmas stash out, or at least somewhere closer to your craft desk, yet??
Hopefully I have and you too may get more use from your Christmas stash than just keeping them for once a year!
If you are still not sure please do check back tomorrow for another pair of cards using more Christmas stash and one make will definately be a non-festive one...
*EDIT: TO SEE ALL THE OTHER CARDS IN THIS SERIES, GO HERE*
'Till then, happy stamping!
      Shop Online With ME!  Host code for November spends over £25 and under £150 is  UATQ2BWV
Stampin' Hugs,

Related Posts Plugin for WordPress, Blogger...