Thursday, 31 October 2013

Have a Washi Halloween!

Happy Halloweeeeennnnnn!!!!!!!!


I really love Halloween and am excited to share this quick, little project I made for you today. 


I purchased some polystyrene balls and wanted to cover one with some of the lovely Witches Brew Washi Tape with a little of the Epic Day tape (the grey one) and this is what it looked like, it was really quick and easy to do too!
 I used the (now retired) Toxic Treats, it is however still available as a download :-) and the spiders web embossing folder behind the treat label, I inked around the edges of the labels using Smoky Slate ink to give this spooky effect
 and added Wild Wasabi stitched Grosgrain ribbon to the top for a pumpkin (sort of) effect..
Thanks for stopping by, I hope you enjoyed today's make? and have a very happy Halloween wherever you are :-)))
OK I have a load of  Halloween decorating to do now and we will all be keeping our fingers crossed that the rain will hold off for everyone tonight!
Waahhh hhaaa hhhaa hhhaaaaaaaa.....
 

Wednesday, 30 October 2013

Quick make Calm Christmas

Hello there,
First of all a special Tag it offer just for you, running until the 30th November
Please go to my shop to see the offers (or click on the link above!)


I have a nice simple make for you today. this is another card you could make a whole bunch of quickly and easily just needing the stamp set Calm Christmas (oooh, it would look fab with Santa's List too) and the Season of Style paper stack :-)
 and a couple of strips of the Season of Style Washi tape wrapped in Linen Thread and the sentiment? That's from Oh Holy Night, another set I need to play with some more!
OK, that's today's card for you
I'll be back tomorrow with more though!
Thanks for visiting today, why not go play with your stamps now ;-)
Stampin' Hugs,
 

Monday, 28 October 2013

CAS Flower Shop Class Card #4

Good Morning!
**First of all a quick reminder that TODAY (28th October) is your LAST DAY to get 25% off 25 selected stamp sets.
Please visit MY SHOP to place your order and make the most of this fab offer**
Now, please accept my apologies for my weekend absence, hubby has been poorly and I have also been working this weekend so unfortunately blogging got side swept :-(. Last week though saw me making lots of cards despite not being able to get in my craft room Thursday or Friday! I do however have a fantastic new cupboard in said craft room, whoop! (this also brings along a ton of other jobs including a trip to IKEA, this week hopefully ;-))
Today I have the last card in my Flower Shop class to share with you, this one was really popular as it could so easily translate to other stamp sets (try Festive Flurry for a Christmas example or Papillion Potpourri perhaps?) and it can so easily be made in multiples too :-)
This version uses Midnight Muse and Sahara Sand with Very Vanilla as it's colour combo...
 Sassy Salutations (again) I'm loving this sentiment set, it has taken over from where Curly Cute left me bereft, *sob * ;-)
 And finally a side view showing that simple can still have plenty of depth! 
We also added rhinestones for that essential bling ;-)
OK, that's all from me for today, I'm of to play nurse maid  to hubs (which anybody who knows me well knows is sooo not my strong point! But I'll give it a whirl! LOL! I bet he'll be better in no time :-S)
Thanks for visiting me today and I hope you all (in the UK) stay safe and warm away from this storm,
Stampin' Hugs,
 

Friday, 25 October 2013

Flower Shop with Gorgeous Grunge and a top tip for punching with the matching Pansy Punch

Hello!
I have the third card from last weeks class for you today using the fab Flower Shop stamp set with it's matching Pansy punch (plus, get 15% off when purchased TOGETHER)
So, the card first and further down this post your need to know on mounting/using the stamps and punch together...
So, I used a pretty colour combo of Crisp Cantaloupe and Basic Grey with Naturals Vanilla for stamping on, the lovely splatters in the background are from Gorgeous Grunge which currently has 25% off! 
BUT only 'till the 28th October!! 
If you only get one of the 25% off sets, Please, make it this one!
(to see more projects using Gorgeous Grunge or Flower Shop please click on the labels at the very bottom of this post) 
Top Tip: I found the best way to adhere these kind of things onto a card is using glue dots :-)
 Punched flowers were added with a single and then double layer of dimensionals, and a few pearls scattered  around too..
 and finally, the sentiment is Sweet Essentials
So, top tip time, I just want to say at this point I was most definitely not the first to do this, I just took pics as I went to save you hunting for it when you mount your set, there are of course lots out there on the web so please feel free to search for others too :-) Thanks too to all those who shared this tip before I mounted mine.
So, that said, begin by punching a piece of card..
 mark the front ;-)
 flip over L-R or R-L and mark the back *remember to keep the top, at the top*
 then add a flower to a clear block and find the top of the flower, there is just one way it fits correctly (if you are mounting onto wood find the top of the flower before mounting onto the block) 
For Clear: Mark your stamp where the top of the punch will be, I chose between the petals as there was a tad more room to add the dot 
For Wood: Simply mark the rubber and mount to flower onto your block with the mark at the very top, not between the petals, you can then mark the front of the block too to show the top.
 Back to clear mount: Follow the stamp round and mark at the top of the foam and then the back, this should then be directly behind the front mark...
 I also marked my punch to remind me (if I haven't played with this set for a while) where the dot goes on the clear mount set, so slightly to the left of the top the same as this punch shows, this shouldn't really need to be done though if you have the wood mount stamps ;-)
and the front too :-)
OK, that's all for today from me, I hope this makes sense and perhaps is a help to someone too?? 
I'm having my cupboard in my craft room finished today so I'll take a few pics and share them with you as soon as it's finished and tidy (hopefully!) I think that might take most of the weekend though ;-)
Thanks for visiting today,
Stampin' Hugs,
 

Thursday, 24 October 2013

Second Flower Shop Class card

Good Morning! 
Today's card is another we made at class last week, speaking of I have a couple of places left for this weeks stamp-a-stack which is running Monday. Message me to come along :-)
So, this class was based around the lovely Flower Shop stamp set which is also available as a bundle with 15% off when you purchase the stamp set and punch together! Bonus!
This card uses a colour combo of Crumb Cake, Black and Primrose Petals. It's a lovely classy combination and perfect for almost any female wouldn't you say?
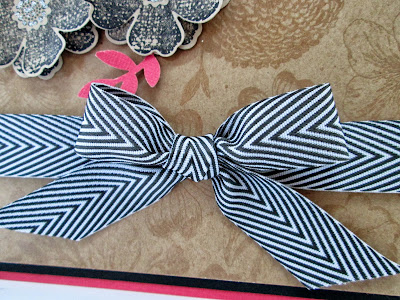
The background paper looks like it's been heat embossed and is called the Natural Composition Speciality Paper. This "paper" more like card stock weight and you could definitely use it as a card base but I personally think it's a bit of a waste to have the embossing on the back of a card ;-) The flowers were stamped with staz on ink onto Crumb Cake card and the leaves are made using the Bird Punch,
 Still loving my chevron ribbon ;-)
 and a side view shows where we curled the flowers with the bone folder and added silver glitter glue to the centres :-))))
OK, that's today's card done for you, I hope you liked it? and I'll be back with another tomorrow!
Thanks for looking today,
Stampin' Hugs,
  

Tuesday, 22 October 2013

25% off Stamps and a Flower Shop and Yippee-Skippee card too!

Hello there,
SU! has an amazing offer to celebrate their 25th birthday, a whopping 25% off 25 stamp sets!!! 
But hurry, because the offer is only running 'till the 28th October.
Why not pop over to MY SHOP to go directly HERE to take a look at all the stamps on offer :-)
So, one of the stamp sets included is Yippee Skippee which we happened to use in my Flower Shop class last week. 
This colour combo of Primrose Petals, Wisteria Wonder and Pear Pizazz really lifts these wet and dreary winter days!
 The Yippee-Skippee sentiment fits the XL oval punch with a Decorative Label punched layer behind
 and plenty of dimension along with the Chevron embossed background finishes today's card offering to you!
OK, I'm off to work now,
Back tomorrow with more paper for you :-)
Stampin' Hugs,

Monday, 21 October 2013

Washi Tape with Gorgeous Grunge Birthday Card

Hi there, 
Another rubbish weather day here again so more crafting is on the cards for me in a bit ;-) (just got about 10 loads of washing and a touch of cleaning to do first!)
Today's card uses some of the lovely Gingham Garden Washi Tape for bright and cheerful card for a teen.
I used a Primrose Petals and Daffoldil Delight colour scheme and added a touch of Gorgeous Grunge to the base. I also used a bit of the Seasons of Style Washi Tape (green tape) to tone down the pink and yellow and make this card...
 Daffodil Delight seam binding ribbon on a clip, this heart shape is retired but you can still get THESE ones,
 Happy Birthday sentiment is the Label Love with the background made using the Bracket Label Punch
 and I added a bit of decoration inside again with Gorgeous Grunge to finish :-))))
Right, that's all from me for today
I'll be back tomorrow with more :-)))
Stampin' Hugs,
 

Sunday, 20 October 2013

Fabulous You!

Hello,
Well, the weather is absolutely atrocious here! Soooo-- I propose a day of carfting! ;-)
But before I go and make a card (or two hopefully) I am going to share this card I made a couple of weeks ago for hubby to take to work.
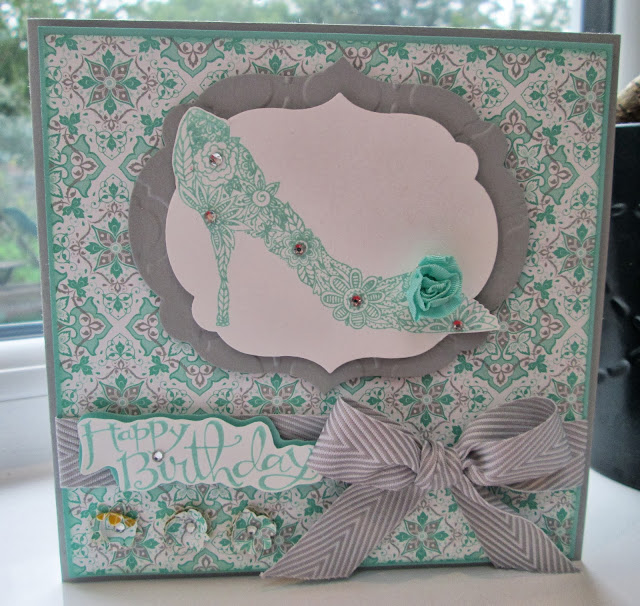
I started with the very pretty Eastern Elegance papers and of course the stamp set Fabulous You, a bargain at just £9.95 in clear!
OK, as you an see the shoe overhangs the framelit I wanted to use a bit so I used THIS TUTORIAL to work round this little problem ;-) 
 I made a very simple ribbon rose with the Coastal Cabana ruffled ribbon , no special techniques needed with this ribbon, simply adhere to a punched circle covered in red line tape! 
The larger framelit behind was embossed using the Modern Mosaic folder.
 I stamped the Sassy Salutations sentiment, hand cut it out and adhered it to matching card before cutting it out again. 
A couple of paper flowers made with the Boho Blossom punch and some yummy chevron ribbon finish the bottom of this card off.
 and double decoration inside so lots of people can sign their best wishes :-)
Right, that's all for today.
Thanks for stopping by today and I hope you find a chance to get inky too!
Stampin' Hugs,

Saturday, 19 October 2013

3rd "Be Merry" Card with Warmth and Wonder by Stampin' Up!

Good afternoon!
After a very fun lunchtime celebrating my youngest's 9th birthday at Laser Tag I am back with you to share my last Christmas card (for a while) using the Be Merry tag stamp.
(To purchase any of the SU! goodies used on my blog please visit my STORE)
I got this lovely stamp last week and have had a blast playing with it! 
This was the third card I made in just a couple of hours, don't you just love it when you get on a creative roll?? ;-)
So, I inked the Be Merry stamp with markers again and hand cut it out to include the borders, I also stamped the snowflake from the Warmth and Wonder Hostess only Stamp set with Gold ink. The trees on the card are also from this lovely set too :-)
  Message me for details on how you can get yours. {You could host a party, place a qualifying order in my SHOP or even join one of my NEW Stamp Clubs??}
Here I used another off cut of paper from my All Day Class which I decorated with another snowflake, punched and inked with gold around the edges.. 
**To see more with  this tag and other uses for the off cuts from the class click on the "Be Merry" label at the bottom of this post ;-)**
Top Tip:  The end of the paper strip was punched with the Postage Stamp punch to decorate
 and a side view to finish which catches the sparkly sheen of the lovely Gold Ink :-)))
OK, I'm off for the night, actually and the weekend, for the first time in a few weeks so it's PJ time for me!
Back tomorrow with more cardy goodness :-)))
Thanks for stopping by today,
Stampin' Hugs,
  
Related Posts Plugin for WordPress, Blogger...