Monday 29 December 2014

Note card using Endless Wishes by Stampin' Up!

Hello!
I found these pictures of some little note cards I made last month on my phone last night and wanted to share them with you today. Thanks for all your lovely comments the last couple of days about still seeing Christmas cards too! I'll share all that I still have with you over the next few days ;-)
For this card I used a colour combo of Lost Lagoon, Strawberry Slush and Sahara Sand stamped directly onto the Note Cards to make CAS one layer cards...
This sentiment is in the set and I thought it made this a lovely wintry greetings card
and a few together to finish
OK, Short and sweet today as I'm off to take my Dad back today after him spending Christmas with us.
Thanks for looking today and I'll be back soon with more :-)
Stampin' Hugs,
Products Used to create this project:

Saturday 27 December 2014

A Little Get our Santa On by Stampin' Up! Christmas Card

Hello!
I hope you have had a lovely Christmas?! I have done zero crafting but am hoping to get in my craft room later today and have a play with my pre-order goodies. I have had these for about a fortnight now and just looked at them, quite a lot! But I have not had a chance to play.. yet ;-)
So, I have one last Christmas card for you today using Get Your Santa On. I do love this little set but it will be retiring on the 5th January :-( I feel like I have just gotten in the swing of Christmas Cards and now it's over! Lol!
I stamped this image onto Whisper White card and punched the top with the Tag Topper Punch, I then layered the white layer onto Pear Pizazz card and trimmed around it to make this tag topper
 I coloured Santa with Cherry Cobbler, Smoky Slate and Skin Tone blendabilities and added a Dazzling Diamonds Beard using a Glue pen
and I added a little layer of Trim the Tree DSP for a pop of colour ;-)
OK, I'm off to take FiL back home today then come back and get a bit cleaned up here and maybe get a bit of crafting time in later too :-)
Thanks for stopping by today, hope you get some crafting time in some today ;-)
Stampin' Hugs,
Products Used to create this project:

Thursday 25 December 2014

Merry Christmas!!

I just want to pop on here today and take this opportunity to wish all my lovely blog readers a Very Merry Christmas with much love and Best Wishes for a fabulous 2015!!
Thank-you for all your support and loyalty over the last year and I look forward to sharing much more with you in 2015.
Have a wonderful Christmas!!
Festive, Stampin' Hugs 

Wednesday 24 December 2014

Christmas Gift Giving using Stampin' Up! Under the Tree DSP with Cheerful Tags and Holiday Home Stamps

Hello,
Hopefully you are all done, sitting down and relaxing by now?? All I have left to do is wrap ribbon around my table presents but I'm taking a quick break to pop on here and share one more Christmas project with you.
So, these little pencil and eraser holders are small gifts I made as Christmas gifts using some of the fabulous Under the Tree DSP, I have used tons of this DSP this year! And it's just prefect for this type of  project as it's so heavy weight. 
To make these holders I cut a 12"x12" piece of paper at 2" then score at 4" but, I recommend for you to score first then cut!!! ;-)
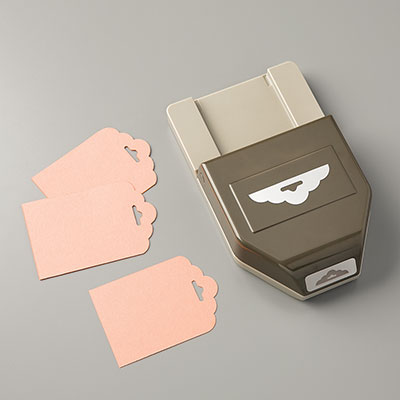
 I used the scallop tag topper punch on each end adding some of this chevron ribbon to the top (this ribbon is in this weeks weekly deals btw ;-))
Then I sewed up each side to secure, I think that's the most sewing I've done all year ;-)
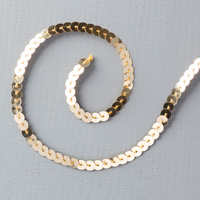
 I used more of the DSP for the front tag. I punched it out using the 2+3/8" scallop circle then stamped, adding some lovely gold sequins with the mini stapler.
 My Top Tip for using a string of sequins like this is to add a drop of Crystal Effects at the rear, so they don't unravel and all fall off! 
 I added a little eraser to each pencil which I tied Bakers Twine around and then (separately) threaded another piece of twine through to tie it to the ribbon. Yes, I know, I thought I could do it in one piece but it proved too difficult to make it sit correctly! Yes, I did question my creative genius *ahem* after making 24 of these!! Ha ha!! I also added a little glue dot to the rear to make her sit just so. OCD much?
A side view
and a few together

I did really enjoy making these (once I finished tying those little erasers to them!) and I hope all those who received one liked them too :-)
I think I have a couple more Christmas cards to show you after the big day and then I'll be onto NEW products (once I get a chance to play, of course) 
So, it's just left to wish you a very Happy Christmas with much love from me to you and yours!
Merry Christmas!!
Products Used to create this project:
Related Posts Plugin for WordPress, Blogger...