
Hello,
As promised here is the tutorial for the Dr Who card from yesterdays post.
You will need pretty basic tools for most of this; score board, bone folder, glue. I used the SU! Bigz Gift bow die and Borderlines stamp set with versamark to make this extra special. Finally I printed off a sonic screwdriver picture and adhered it inside the jacket. I am also going to have a go at making this in a Tuxedo style card, watch this space. Anyway, here is the Dr Who version :-)
EDIT TO SAY: HERE is the Tuxedo Card for you
Polite Note: I'm extremely flattered and happy if you want to use this tutorial to make your own cards for personal use but I kindly ask you do not replicate this tutorial and instead link back here to this original tutorial. If you have any questions or queries please do message me :-) Thank you x

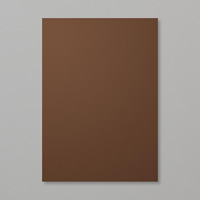
Start with an A4 sheet of card, this is early Espresso.
Score at 8cm along the longest edge
.JPG)
turn it around and score again at 8cm
.JPG)
fold in each sides and re-enforce with your bone folder

Measure 13cm down and 2cm in at the top, from the outer sides, on each of the front sections.

Score between these points - to make this "v"

At the top measure 5.5cm in on each side from the outer edge


Fold out using your bone folder to re-enforce the score lines
.JPG)
Mark both sides at 3.2cm down (from the top edge) on the inside edge of the jacket.

.JPG)
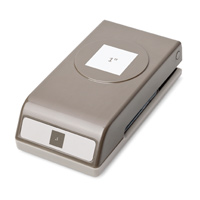
TOP TIP: Use a square punch if you have one ;-)
You can glue the lapels down at this point, I added glue to just the section above the notch.
TOP TIP 2: Use a wooden clothes peg to hold the lapels to the front while the glue dries.
You can glue the lapels down at this point, I added glue to just the section above the notch.
TOP TIP 2: Use a wooden clothes peg to hold the lapels to the front while the glue dries.
.JPG)
Measure down 4.2cm from the bottom of the lapel and add a stitched button hole with an Early Espresso Marker Pen,
.JPG)
continue adding stitches all around each edge except the outer folded edges
.JPG)
To make a shirt from Soft Sky card:
Large Shirt Section: 11.5cm x 21cm
Centre Button Strip: 2cm x 21cm
Top strip: 2cm* x 21cm
Collar: 2 pieces; 5.2cm x 4.5cm across top. Trim to 5.2cm x 4cm at the bottom
*mine is 1.5cm deep but a second version (coming soon) looks better at 2cm deep
Add stripes with Borderettes stamps and Versamark at every 1cm

Lay the shirt inside the card with equal gaps at each side
.JPG)
Add glue to the left hand side ONLY, and only to the left hand edge of this side.
Close jacket front over to adhere the shirt.
.JPG)
To make a pocket:
Pocket Size: 4cm (w) x 5cm (h), trim away bottom left hand corner. Add pen stitching.
Pocket Handkerchief: 6cm square, trim away bottom edge and fold.
Add glue to top of pocket to adhere hankie
.JPG)
.JPG)
.JPG)
.JPG)
Add dimensionals and glue to the rear of the pocket and adhere to the card front running along the side seam...
.JPG)
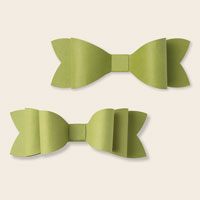
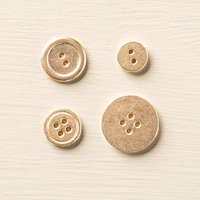
...like so. Add your bow tie with glue and your buttons with Glue dots.
.JPG)
Add a 11cm x 20cm insert stamped with a sentiment.
.JPG)
And you're done! One Dr Who/Man's shirt and jacket card!
.JPG)
I really hope you liked today's tutorial, I'll definitely be making more of these cards and I'll share with you as soon as I do!

Thanks for looking today and if you have any questions or comments please do click on the comments tab below and I'll get back to you asap.
If I can help you get any supplies you need then please do visit my SHOP or click on any picture below.
Bye for now,
Stampin' Hugs,

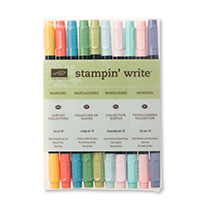
Products Used to create this project:
 |
 |
 |
 |
 |
 |
 |
 |
 |
 |
 |
 |
 |
 |
 |
 |
 |
 |
 |
 |
 |
Thank you so much for the instructions! My niece is a huge fan of the 11th Doctor. She'll love this birthday card... I used red satin wired ribbon for my version of the bow tie & pocket kerchief. ("Bow ties are cool" —Doctor Who)
ReplyDeleteThanks for stopping by and I'm so glad you liked this card and tutorial! and I really hope your niece likes it too :-)
DeleteHugs xxx
gREAT cARD! tHANKS FOR SHARING, i CAN' WAIT TO HAVE A GO AT THIS.
DeleteWhat a great card! I'm going to attempt to make one for my nephew's 21st birthday. You are very talented. I also love how descriptive you are in your tutorial and the pictures are very clear and show exactly each step. Thank you so much for sharing. Just wondering, as i dont have the S/U bow maker, do you know of a way i can make the bow tie?
ReplyDeleteHi, Thanks for stopping by! I'm sure your nephew will love it and I'm glad the tutorial is clear to understand :-)
DeleteSadly the die is now retired that I used for the bow tie but if you have an enveloppe punch board then there are tons of tutorials for making a bow using this, just pop that into google and it should give you some links.
I'd love to see your finished creation too!
Have fun, hugs xx