Hello!
Long time, no blog! Well, a week anyway ;-)
I have had a few, lovely and well needed days away with the family in London (the magnum ice cream shop in Covent Garden was awesome!! check it out on my Instagram feed), a fun day at Chessington World of Adventures on the roller coasters and then a day in beautiful Brighton looking at the cool shops and cafes, finishing with dinner at the most amazing mexican restaurant La Choza, I can highly recommend the food and the service was wonderful too :-) It was just a lovely time spent together :-)
I have had a few, lovely and well needed days away with the family in London (the magnum ice cream shop in Covent Garden was awesome!! check it out on my Instagram feed), a fun day at Chessington World of Adventures on the roller coasters and then a day in beautiful Brighton looking at the cool shops and cafes, finishing with dinner at the most amazing mexican restaurant La Choza, I can highly recommend the food and the service was wonderful too :-) It was just a lovely time spent together :-)
So, after that brief update I am back to blogging and have a ton of card-y things to share with you over the next few weeks, but tonight I want to share with you the picnic blanket I made a while back for this "summer". Sadly, said summer has still not really happened in the UK and we are fast running out of time :-( But, I have this nice, thick blanket- all ready for when it is dry.... one day.... :-)
So, to make this blanket I used a layer of thick blue fabric for the bottom sewing on a layer of thin, warm fleece at regular intervals and then sewing the bottom pieces to the top piece of fabric (right sides facing) before turning it the right way round (sewing it closed), and adding a stitched border.
Sounds easy right? And it is if your top and bottom fabric is the same size but my blue fabric was wider and shorter than the top so it took waaay longer than it should have! But I love it! So it was totally worth it!
 The top and bottom really didn't need sewing together as there is no wadding as such, however I had these cute, felt pieces from many SU! catalogues ago and I thought they would look super cute sewn randomly over the banket top and having the dual purpose of holding the top to the bottom :-)
Sounds easy right? And it is if your top and bottom fabric is the same size but my blue fabric was wider and shorter than the top so it took waaay longer than it should have! But I love it! So it was totally worth it!
As a late addition I added a little pocket to the back to hold the ribbon ties in whilst it's unrolled and in use. No chance of tripping over those now!

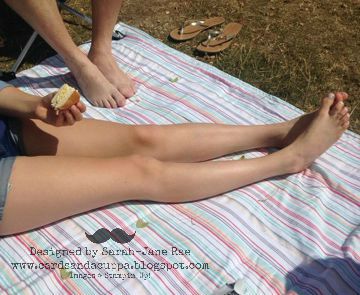
and here we are (Zoe and the hubster) on one of only two days at the beach so far ;-)
Because I added the thin fleece layer inside it's super thick and perfect for laying out on and not having any of those pesky sharp stones digging in you :-)
(sorry this pic is not great as it was from my phone)
 So, there we have it!
I hope you have enjoyed tonights post? A bit of a change from me but I have really enjoyed making time to sew some this summer :-)
But, I have a ton of paper craft projects to share with you now too some using new Christmas Catalogue items!! Whoop, I love Christmas :-) If you would like a FREE copy of the new Seasonal catty please drop me a line. Remember: if you have ordered with me in the last few months I will be sending you a copy but if you chose "No Contact" when checking out I don't have your details so please message me and I'll make sure you get a copy :-)
OK, This has been a much longer post than I thought to start with as I just have so much to tell you!! So I hope you are still with me??
Thanks so much for stopping by today,
Because I added the thin fleece layer inside it's super thick and perfect for laying out on and not having any of those pesky sharp stones digging in you :-)
(sorry this pic is not great as it was from my phone)
I hope you have enjoyed tonights post? A bit of a change from me but I have really enjoyed making time to sew some this summer :-)
But, I have a ton of paper craft projects to share with you now too some using new Christmas Catalogue items!! Whoop, I love Christmas :-) If you would like a FREE copy of the new Seasonal catty please drop me a line. Remember: if you have ordered with me in the last few months I will be sending you a copy but if you chose "No Contact" when checking out I don't have your details so please message me and I'll make sure you get a copy :-)
OK, This has been a much longer post than I thought to start with as I just have so much to tell you!! So I hope you are still with me??
Thanks so much for stopping by today,
Stampin' Hugs,

.JPG)
.JPG)
.JPG)

.JPG)


.JPG)
.JPG)
%2B-%2BCopy.JPG)
.JPG)
%2B(2).jpg)


.JPG)
.JPG)
.JPG)
.JPG)
.JPG)
.JPG)
.JPG)
.JPG)
.JPG)