
Hello there,
I'm going to keep the chat down low today is there are about a million pictures to this tutorial! OK, slight exaggeration there but you'll soon see as we get further in.... ;-)
My (not so little any more) baby is 9 today (eek!) and he just loves Star Wars so I wanted to go with a Yoda card. I (slightly optimistically) thought it might be easy? I have to say it wasn't not too bad once I got into it, but yes, it's fairly simple to copy from this tutorial :-)
Please can I ask if you do make your own version you link back here, thanks x
So, this is the image I was inspired by..

and this is the card I made for Zack....

Plenty of dimension and inking

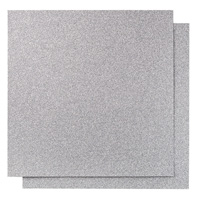
The planet was two circles cut from the corner of black and grey card (so there was no extra trimming required, smart huh?) with 3 different sizes of hole punches in the black layer to make the craters :-)

and Yoda himself, a bit menacing looking perhaps?

and decorated inside simply, just punched the stars away and adhered to the Midnight Muse card layer

So, to make Yoda you will need to start the following punches and framelits:
Owl, Word Window, Boho Blossoms, Bird, 1+3.8"circle punches (ALL PUNCHES HERE) and the Labels Framelits


Here are the basic parts for Yoda:
You need to die cut two of the third smallest framelits, fold one over and trim the other to fit inside (see I had to remove a bit extra to make it fit and I also removed a small section with the circle punch around the neck), one circle, two wings from the bird punch make his ears, 4 flowers from boho blossom make his hands and feet, and a whole and part word window make the light sabre, (Owl punch eyes will follow shortly).
Card: Yoda is all Old Olive, his coat is Crumb Cake and light sabre is Gumball Green and Basic Grey.
Ink all the edges (including folds) in matching ink, it makes a massive difference to the overall look ;-)

Add dimensionals to the inside of his coat after folding the sleeves over

Adhere the cut down layer slightly higher so you can see the bottom edge of the bottom framelit, then add two dimesionals ready for the sleeves but do NOT stick down yet ;-)

Add Yoda's feet next by adding glue to the bottom of two of the flowers with their petals folded over (make sure you ink those folded edges), tuck under the edge of the top layer of framelit (see above too ;-))

To make Yoda's hands; again fold over two of the petals from your boho blossom add a drop of glue; this time at the top like so, and adhere to the underneath of the sleeves...

fold over to ensure they are positioned correctly before removing backing from dimensionals to adhere sleeves,

OK, time for the fiddly! I used tweezers to help with this bit and a glue pen to stick them together.
Punch two of the largest circles from the owl punch in Old Olive and again in White card. Cut a small section away from the centre of the olive circles, ink and adhere to the top and bottom of the white layer. Punch two of the very smallest circles in grey for the pupils and adhere between the lids.

Run the top part of the circle through the Big Shot with the Square Lattice Folder to make the top of Yoda's head....

Adhere his ears (wings) and eyes, draw on his mouth (I used the Old Olive Marker)

add a few lines to the handle of the light sabre

and adhere to the Gumball Green section, I added a brad in green as I didn't have a red one (which might have been better?) Adhere with glue in his hands now.

OK, double up the dimensionals at the top ready for his head

and there he is finished!

and on his card again with a few silver glimmer stars to decorate :-)

Phew! I told you it was a long post!
If you managed to stick with it I would like to say thanks and I would also love to see if you make your own version of my Yoda, so please do share!
Thanks for stopping by today,
Stampin' Hugs,

Products Used to create this project:
 |
 |
 |
 |
 |
 | |
 |
 |
 |
 |
 |
 |
 |
 |
 |
 |
 |
 |
 |
 |
 |
 |
 |
 |
 |
 |
Wow! Just genial!!! As I don't have a young boy ...only a 18--year-old girl *g...but a great Yoda fan... I already did 2 Yodas today ... one of them accompanied her to her driving-test today.... may the power be with her ;-)
ReplyDeleteSorry, Í'm not able to post a picture, but they look pretty much like yours, as I own everything (!!) needed to do the punch-art.
Thankls again and have a nice day!
lg angelika
p.s.: the power was with her, she's got her driving -liscence:-)
ReplyDeletelg angelika
absolutely brilliant, what a great job you've made
ReplyDeletePrecioso! Muchas gracias por el tutorial! Bss
ReplyDeleteThis is absolutely fab SJ. I made Neil's card today. Will link back to your blog when I post on Monday. A xx
ReplyDeleteWhat a wonderful card thanks for sharing the tutorial best wishes Lesley x
ReplyDeleteThis is so awesome! I love it. Thanks for sharing. Your tutorial is great! : )
ReplyDeleteI made Yoda based off your tutorial! You really explained it so well. I posted my card on my blog and gave you shout out! Thanks again. You rock!
DeleteI made Yoda based off your tutorial! You really explained it so well. I posted my card on my blog and gave you shout out! Thanks again. You rock!
DeleteThis comment has been removed by the author.
ReplyDeleteWow! What an amazing job you did explaining everything! My son is turning twenty next month so this is perfect! I have just finished the Yoda without the card base. I love your moon idea as well. Very clever. Thank you! I will now try to send you a pic : ) I did not have the boho punch so used the dies from a secret garden the ears came from the blossum punch. AGAIN THANK YOU,!
ReplyDeleteThis is such a fantastic card!! Thank you so much for your generosity by sharing your instructions. I made this card for my friend's little man - he is a big Star Wars fan. :)
ReplyDeleteFabulous, fantastic and wonderful card! Thank you for your generous and easy to follow instructions. I case'd your card here and linked back to your tutorial.
ReplyDeleteThanks again :) My card is here - http://gothdovedesigns.blogspot.com.au/2014/06/stampin-up-australia-yoda-birthday-card.html
You made my day!! This is the perfect idea for a card for my godchilds birthday - you can see my version here: https://locata.wordpress.com/2015/01/31/happy-star-wars/
ReplyDeleteThanks a lot for sharing this !!
Bine
Fab card, so glad you enjoyed the tutorial xxx
DeleteI found your Yoda card online (looks like lots of people have!) and made Yoda this afternoon for my grandson's 8th birthday next month. I think he turned out really cute and would like to thank you SOOOOO much for the tutorial. It was easy to follow and replicate (well, as close as I could -- mine is not quite as nice as yours). Thanks again. I know my grandson will appreciate it. (Last year he was into Legos and I found a cute Lego card for his birthday. He tried to pull off the dots making the lego block!!! Hope he doesn't tear Yoda up!)
ReplyDeleteI am also making a Yoda card only using a curvy keepsake and just adding a head, cape and light sabre. It's for my youngest son who is dare I say it 34 today Feb. 25th.
ReplyDeleteThanks so much for the inspiration and tutorial.
ReplyDeleteDebi
https://thatmightlookgoodonacard.blogspot.com/2018/05/fathers-day-card-marathon.html