
Hello!
So, it's been a bit quiet on the ole blog this week but that doesn't mean I'm not making pretty things to share with you. I have been furiously creating and trying to get ahead for ( a very busy) February and I have been sharing a few sneak peeks on Instagram/Facebook/Twitter. So if you want to keep up with what's going on at Chez Rae then please feel free to follow me on your favourite social media :-)
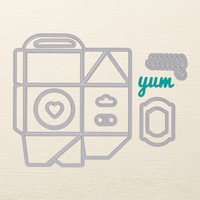
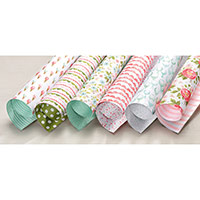
OK, so I have a cute Bakers Box to share with you today using the Birthday Bouquet DSP and I've made a little photo tutorial sharing my tips, for those of you who haven't yet used their box (like me!).
Lets take a look at the box I made first...


So, I originally laid the die, cutting side down, on my DSP and thought it was marginally larger than 6" square, so I flipped it over to double check and found I could get more bang for my buck!
I cut my 12" x 12" Birthday Bouquet DSP into two 6" x 6" pieces (shown here).
You can now also take two sheets of 6" x 6" sheets of any SU! paper stack too!
I love that our paper stacks are 6" x 6" now :-)
Now, to cut this box I used this sandwich:
*Magnetic platform,
*a bottom plate
*then place your die down with the cutting side facing up.

2. *Note and if it has a "direction" ensure the bottom of the design aligns with the bottom section of the die (shown to the left here)
3. Ensure the DSP covers the cutting blades, it's going to be close!
4. Pop a top plate on and roll through your big shot to cut. Repeat for the second half.

And one more photo of this cute box to finish today!
OK, that's all from me for today, I really hope you enjoyed todays post and my little tutorial was helpful? Do let me know :-)

Stampin' Hugs,

Shop Online With Me
Spring/Summer Catalogue
Annual Catalogue
Sale-a-Bration Catalogue


No comments:
Post a Comment
Thank-You for any comments you may leave, I appreciate the time it takes to do so and I love to read them all :)