Thursday, 12 December 2013

Mini Milk Carton Bird Houses with Christmas Owls

Hello there, 
Hubby went on his work Christmas do today and he wanted a little something for the girls he works with so this is what I spent a whole day last weekend making ;-)
I started with the Mini Milk Carton Die, some Crumb Cake card {the Crease Pad makes this job a lot easier as the score lines are a lot less likely to cut right through ;-)} and of course the Big Shot!
Once cut I folded the score lines and then before assembling I stamped with the Woodgrain Background stamp.
Top Tip: This die cut carton is too big to stamp all in one go, I simply folded it in half and stamped twice, this also gives the added bonus of the woodgrain was going vertically as it would naturally :-)
 To make the roof I punched strips of Early Espresso card with the Scallop Edge Punch, then stamped the strips using White Craft ink and the (retired) Serene Snowflakes stamp set. A current set that would work could be Festive Flurry. Then I inked each edge, again with white craft ink, before glueing them first together and then to the milk carton sides. 
A torn white card strip makes the snow cap and when removed allows access to the goodies inside :-)
 Then I added a Punched Owl accented with Red Glimmer Paper to the front,
and sat him on a Gumball green branch made with the Bird Punch
 and Santa Owl was topped with a cute hat :-) 
 OK, I will share the finished bagged and tagged houses with you tomorrow but that's all from me for tonight.
I hope you liked today's treat holders and thanks as always for looking.
Stampin' Hugs,
 

Tuesday, 10 December 2013

Clearance Rack Blitz is on!!

Hello there,
SU! have added a whole heap of new goodies today to their Clearance Rack today! 
You can go visit my shop HERE and see.
Why not take a look through and get the things you actually want in your stocking this year? ;-)
Like this Coral Ruffled Ribbon for just £3.59, then you could make these ribbon flowers :-)

Or this Scalloped Tulle, a bargain at just £1.29!
 plus they have this yummy Gold Smooch Spritz spray for just .99p! ....
...which looks like this on a card, fab huh?!!
 OK, off you go to my SHOP and have a look. If you live close to me I am placing an order in the next couple of days and you can add to it for FREE post if you collect. Unfortunately you run a risk that it will be sold out though if you do this. 
If you NEED or HAVE TO HAVE some goodies from the rack please place your order directly through the shop to be sure of stock being available or email me your order and I can place it immediately (p+p will be £4.95)
Any trouble or questions please ask!
Stampin' Hugs for now,
 

Monday, 9 December 2013

Simple Six Sided Sampler cards with Oh Goodie!

Hello!
I have had the most lovely weekend, very relaxing with plenty of crafting (which I can share with you after Thursday!), perfect! 
But today I have a few simple one layer cards I made last week to send out with parcels.
I grabbed some (retired) notelets and my {very under-used} Six Sided Sampler stamp set to make these 3" x 3" cards in Smoky Slate and Crisp Cantaloupe.
The cute little sentiment is from the Oh Goodie! set which is actually in the main catalogue but also in the Autumn/Winter seasonal HERE teamed with the Goodie Gear treat bags and tags,
 Sentiment inside is also from the Six Sided Sampler set
 and I finished them with Coral Bakers Twine 
OK, I have a load more fun, crafty things to finish today so I'll be off for now :-)
Thanks for stopping by today
Stampin' Hugs,
 

Saturday, 7 December 2013

Tri-fold Christmas Card with FREE Tutorial

Hi there!
I've got a card for you today but I'm not totally sure what it's name is! Any suggestions gratefully received...
I have seen these around plenty but thought they looked a little tricky tbh so didn't bother with them... until now that is! They are really actually very easy to make and I have added a little tutorial at the end of this post  to help persuade you to have a go sharing my measurements and a couple of top tips too ;-)
So, to start this is the card I made,
I made this version in Pool Party card with Island Indigo DSP from the Winter Frost pack and a Bermuda Bay 3mm ribbon bow. Stamp set is Wishing You, a very versatile set that will still be used long after Christmas, this little stack of presents is great for birthdays too! See THIS CARD.
 And inside....
 OK, let's make it!
Start with a piece of A4 card, cut it in half at 10.5cm to make this base. Score at 8cm and 19cm.
 fold it on the score lines ensuring the larger section is inside and the shorter is above.
 punch a hole with the TOP score line in the centre of the 2.5" circle punch
 which should give you this...
 punch a 2+3/8" scallop circle from DSP
 flip it over and position, add glue to the section that will adhere to the card
 add the image with dimensionals after and decorate the top flap along the edge with the Scallop Edge Border Punch
 Tie your ribbon around a 7cm x 10cm piece of DSP and adhere to the bottom flap
TOP TIP: Ensure there is enough room for the 1" circle to go above the bow and the top section to tuck in
 Stamp first, then punch a 1" circle of card for the closure
TOP TIP: I used the card I punched out with the 2.5" circle, it's plenty big enough even with the score line
add a dimensional at the bottom of the circle and adhere above the ribbon but low enough for the top flap to fit in easily
Add a 7cm x 10cm piece of white card and decorate inside too
and your finished card again
Well, I hope you liked today's make and you have a go at making your own :-)
 I love this style of card and that it still only uses half a sheet of card I think is fab!
Thanks for stopping by today,

Friday, 6 December 2013

Washi Tape (is not just for cards!) and the Warmth and Wonder Stamp Set

Hello there!
Today's card is very much a layered card. I used a combination of the Tape It stamp set, Season of Style Washi tape, some sneak peek Gold Washi Tape, more sneak peek gold sequins ;-) and some of the very lovely Gold Foil Sheets which I punched out into little stars
Tons of sneak peeks on this card today!! All combined to make this...
 I added a Bunny Ear bow (see the "how to" video HERE) using Bakers Twine and a Champagne Glimmer Paper star too..
 Stamped Gold snowflakes and the Noel Sentiment are from the {very well used this year} Warmth and Wonder stamp set
 and finally a look at one of the many other uses for Washi Tape!! My tax disc holder simply refused to stay on the car window last week!!! So, out came the Washi tape! 
See, it's not just for cards you know ;-)))) ha ha ha!!!
OK, I'm off to work again,
Back tomorrow with another card and another mini tutorial for you :-D
Stampin' Hugs for today,
 

Wednesday, 4 December 2013

Quick Tree Christmas Card

Hello,
Today, I have the third card from class last week for you :-)
This card is a great way of using up scraps as your "branches" can be any width (mine were 1/2cm each as I, surprisingly, had no scraps!) I used the Winter Frost paper stack, yep, this one is still going strong too! Gotta love these little stacks ;-) I used an Island Indigo base with Smoky Slate and Whisper White layers to make this...
 The trunk was stamped with the Timber Wheel stamp (which I have un-mounted, see HERE for how to do this) and we aslo embossed the white card layer using the Northern Flurries folder
 and a double Bakers Twine bow with a Silver Glimmer paper Star top this tree off!
That's all form me for today, I'm typing tutorials now after making 7 cards this morning! 
Let me know what you're up to today and if you like the card of course ;-)
Thanks for visiting,
Stampin' Hugs,
 

Monday, 2 December 2013

Postcard with Calm Christmas

Hello!
I've been in town today finishing up my Christmas shopping! Almost, that is, but not quite!
So, today I have a card we made at class using the Postcard Stamp which I teamed here with the very lovely Calm Christmas stamp set.
We went with the vintage styling of the postcard and stamped it using Crumb Cake ink with a few splatters from Gorgeous Grunge at opposite corners (also in crumb cake) finishing by adding the stamped dove in Soft Suede ink. After distressing all the edges, we stacked the image onto a (also distressed) soft suede card layer, this would be another fab card to post as it's nice and slim! We finished the card by wrapping Cherry Cobbler Bakers Twine around like a stack of post might have been (?)...
We also added a sentiment which is from the Clam Christmas set, stamped with the yummy Gold Ink pad
Right, I'm off as were are having a lovely take-away for tea tonight :-) (Yay, no cooking for me tonight!!)
Stampin' Hugs form me for tonight,

Sunday, 1 December 2013

Joyful Christmas Messages and Valentines too!

Hello there, 
Today's post shares one of our cards from this weeks class, some Valentines products (I know! Organised huh?) and a kit to design your own stamps with!
So, Valentines first!
SU! have gotten ahead again and organised your Valentines stampin' and gifting, I personally *heart* the little bags printed red with white hearts all over ;-)  (we got to see these products first at convention;-)) And also the Monster Hugs, simply adorable!! I will definitely be needing both of these ;-) GO HERE to see more!
 Now, onto "Undefined" This is a new product we also got to see (and we received a little sample of too) at convention, If you can draw a simple shape then you can do this! The only limit is your imagination and it's available in the UK now! See HERE for details
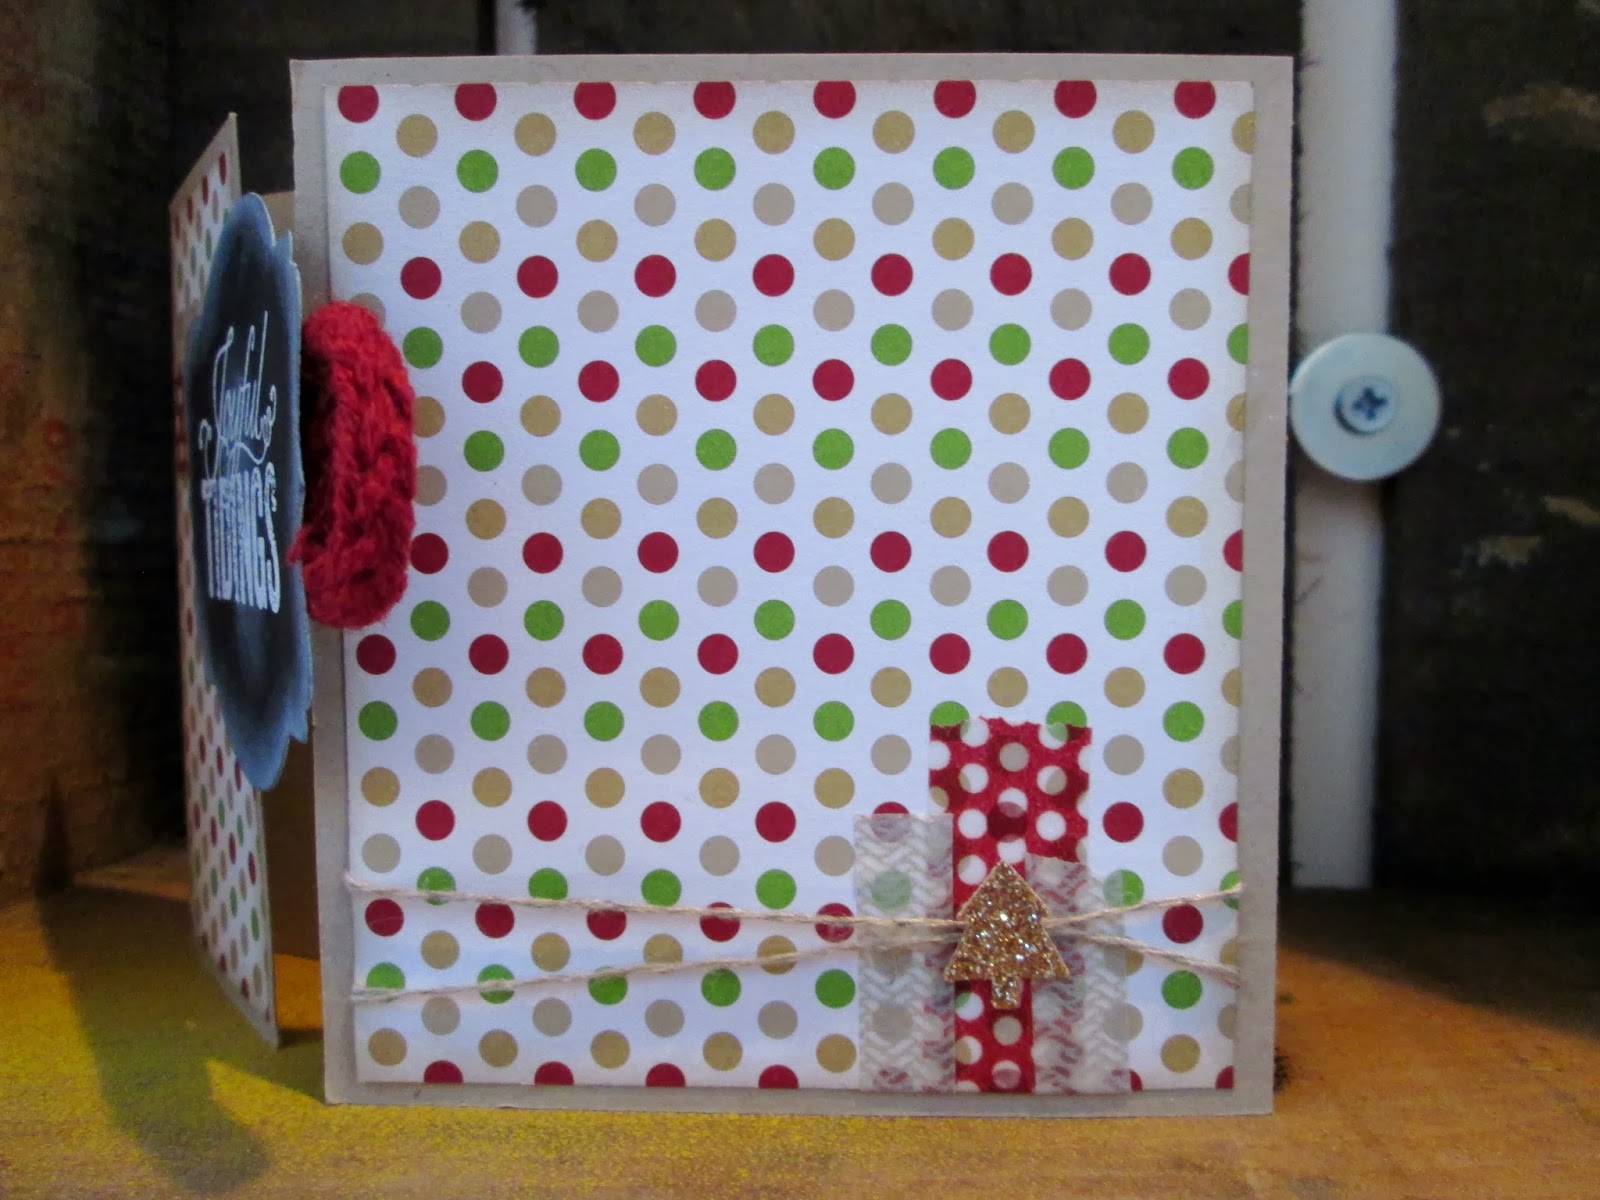
 OK, onto a card, as I said we made this card at class last week, it's a side gate fold with a chalkboard topper using Christmas Messages,
 Season of Style paper stack (mine just seems to have just kept going and going! Great Value!) with matching Washi Tape wrapped with Linen Thread and topped with a Gold Glimmer paper punched tree
 and the chalkboard style topper was made using the Deco labels dies :-)
OK, I'm off to make a roast Lamb dinner,
Back tomorrow with more cards
Stampin' Hugs for today,
 
Related Posts Plugin for WordPress, Blogger...