Friday, 20 December 2013

Merry Christmas Teachers!

Hello there,
I hope today's post finds you all well? I am a lot earlier today (thank goodness! Do I hear?) but wanted to quickly share with you a simple gift for last minute giving and one I sent in with my children to school for their teachers this year :-)
**Just a note: All product links for items used will now at the bottom of each post :-)**
This Rhudolph in the dark has been done many times before so I don't claim any credit but I remembered I had a load of googly eyes from last Halloween I never got around to using so thought they would be perfect for making quick tags on  these gifts!
I got these festive take out cups free from the coffee shop when I purchased the Gift Cards...
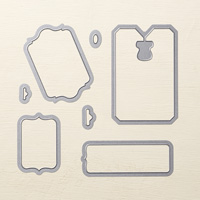
 To decorate I simply bagged them up and made tags using White Craft ink to stamp the (retired) Serene Snowflakes (try Festive Flurry for a current alternative) onto Garden Green card which I had die cut using the Windows Frames framelits. I also die cut the "shop style" hole in the green card layer with the Chalk Talk dies.
I then added the sentiment from the Wishing You stamp set onto a smaller die cut piece of black card which I heat embossed with gold powder. 
Rhudolph was just a pair of the googly eyes with a red brad underneath ;-)
 I tied the cello bag with Cherry Cobbler bakers twine adding the last of my sweater trim from last year and a couple of jingle bells to the top before adding my tag.
 and inside the cup? Some choc's in the bottom, raffia layer with the Costa Gift card snuggled in! Just what a teacher (or most people!) could use, a bit of time out at Christmas!
Well, that's all from me for today. I'm off to wrap as I have tonight off of work for a change :-)))
Thanks for visiting today
Stampin' Hugs,
 
Products Used to create this project:

Thursday, 19 December 2013

Oh Goodie! with Goodie Gear Treat Bags

Hello there,
I hope you are all getting on well with your Christmas preparations? I have still got a load of wrapping to do but at least I have found all my gifts :-s
I have also been crafting too and made these little goodies bags to go with my friends children's presents using the Goodie Gear treat bags, these little kits are fab when you are short of time (and who isn't at this time of year?) because everything is there and ready to go.
I love the mini sized tags which are the same shape as the Chalk Talk framelits, so cute! 
I stamped all over them tags with the Oh Goodie!  stamps using Versamark for a subtle background, the striped borders are included in the kits as is the bakers twine and the banners which are all pre-cut and ready to go...
 I did add some little trees with the Merry Minis punches and some Silver Glimmer Paper for a bit of bling
 And here they are all together :-))))
OK. that's all from me for tonight. I'll be back tomorrow with a Christmas card but I am going to have to save some of my makes to share with you after the big day so as not to spoil any surprises ;-)
Thanks for looking today!
Stampin' Hugs,

Tuesday, 17 December 2013

O Holy Night and my first try with the Envelope Punch Board!

Hello!
So, before I went to convention, way back in November, I had my Envelope Punch Board delivered, but alas time was short and I didn't get chance play before I went :-( Luckily I got to have a go at convention and was suitably wowed by this little gem of a gadget, even if when I ordered it, I was a bit unsure as to truly how often I was going to be bothered to make my own envelopes? I'm sure there are quite a few people out there thinking the very same thing?? 
This leads me to share with you exactly why you need this little gem of a board! As I'm sure lots of you have done, I designed a pretty, but quite deep card for my last class but didn't want it getting squashed in a standard envelope and so I spent {rather a lot of} time figuring out a boxelope to hold it. 
Obviously once I had worked out the measurements it was easy-peasy and as a bonus if you purchase the Envelope Punch Board from me I will email you this tutorial for FREE! 
TIP: also try googling: projects with the envelope punch board
So, you want to see this card and boxelope? Of course you do ;-)
 I used a Cherry Cobbler, Crumb Cake and Black colour combo with the Season of Style paper stack and Champagne Glimmer paper snowflake die cut accent ( my die is last years and retired but we do have Framelits and a matching stamp set this year instead)
 O Holy Night stamp set was used for the sentiment using the Chalkboard technique again (I am loving this right now) and die cut with the Deco Labels dies (also loving these too!!)
 a Cherry Cobbler Seam Binding bow was layered with a touch of  Crochet Trim and Natural Trim Ribbon too, all tied on with Linen Thread, very rustic ;-)
 And we wouldn't want that lovely bow getting squashed now would we??
 So here is the boxelope I made with the Punch Board with a matching belly band, also decorated with versamarked snowflakes too :-)
OK, that's all from me for today.
I'm off to post out my parcels for today and then hopefully get back into my craft room later too!
Thanks for looking today and I hope you enjoyed the card :-)
Stampin' Hugs,
 

Monday, 16 December 2013

Candy Wrapper with Paper Bows

Hello there,
Apologies for the late hour of this post but I wanted to pop on and share a little creation with you before bedtime ;-) It will be a short and sweet post tonight though!
So, I had my last class for this year last week and wanted to make little gifts for those who made it and as usual I returned to the trusty candy wrapper die (even thought it's retired, I simply cannot part with it!) and made these... 
(well, I actually made more but three stacked so well together ;-))
I used the lovely Winters Frost Paper for both the cracker and the paper bow, the bow was made using the Large Oval Punch in the shiny speciality paper from the pack, pretty!
and to finish the sentiment was stamped onto smoky slate card using Teeny Tiny wishes and punched with the Decorative Label Punch before adding to the cracker.
 OK, that's all from me for now.
Back soon with more craftyness but thanks for looking today!
Stampin' hugs,

Saturday, 14 December 2013

Completed Milk Carton Bird Houses :-)

Hi there,
As I promised in my last post, today I am sharing the Bird Houses as hubby took them, all completed. I decided to make matching tags, again with Owls :-s and bag them up all decorated and pretty :-)
So, I started with the Deco Labels dies and stamped the Crumb Cake card layer using White Craft ink and (the retired) Serene Snowflakes again...
 adding another Owl  again accented with Red Glimmer Paper.
Go back to yesterdays POST to see all the ingredients you need to make the owl...
 and here the labels are all together :-)
 To complete these gifts I added them to a layer of white tissue paper "snow" in a Gusseted Bag (sold out from the clearance rack now, unfortunately) and added the tags with Linen Thread
 and to finish I added a few Glimmer paper punched trees to the snow :-)))
OK, That's all for tonight. 
I'll hopefully be back tomorrow afternoon with a new project to share with you.
Thanks, as ever, for stopping by today,
Stampin' hugs,
 

Thursday, 12 December 2013

Mini Milk Carton Bird Houses with Christmas Owls

Hello there, 
Hubby went on his work Christmas do today and he wanted a little something for the girls he works with so this is what I spent a whole day last weekend making ;-)
I started with the Mini Milk Carton Die, some Crumb Cake card {the Crease Pad makes this job a lot easier as the score lines are a lot less likely to cut right through ;-)} and of course the Big Shot!
Once cut I folded the score lines and then before assembling I stamped with the Woodgrain Background stamp.
Top Tip: This die cut carton is too big to stamp all in one go, I simply folded it in half and stamped twice, this also gives the added bonus of the woodgrain was going vertically as it would naturally :-)
 To make the roof I punched strips of Early Espresso card with the Scallop Edge Punch, then stamped the strips using White Craft ink and the (retired) Serene Snowflakes stamp set. A current set that would work could be Festive Flurry. Then I inked each edge, again with white craft ink, before glueing them first together and then to the milk carton sides. 
A torn white card strip makes the snow cap and when removed allows access to the goodies inside :-)
 Then I added a Punched Owl accented with Red Glimmer Paper to the front,
and sat him on a Gumball green branch made with the Bird Punch
 and Santa Owl was topped with a cute hat :-) 
 OK, I will share the finished bagged and tagged houses with you tomorrow but that's all from me for tonight.
I hope you liked today's treat holders and thanks as always for looking.
Stampin' Hugs,
 

Tuesday, 10 December 2013

Clearance Rack Blitz is on!!

Hello there,
SU! have added a whole heap of new goodies today to their Clearance Rack today! 
You can go visit my shop HERE and see.
Why not take a look through and get the things you actually want in your stocking this year? ;-)
Like this Coral Ruffled Ribbon for just £3.59, then you could make these ribbon flowers :-)

Or this Scalloped Tulle, a bargain at just £1.29!
 plus they have this yummy Gold Smooch Spritz spray for just .99p! ....
...which looks like this on a card, fab huh?!!
 OK, off you go to my SHOP and have a look. If you live close to me I am placing an order in the next couple of days and you can add to it for FREE post if you collect. Unfortunately you run a risk that it will be sold out though if you do this. 
If you NEED or HAVE TO HAVE some goodies from the rack please place your order directly through the shop to be sure of stock being available or email me your order and I can place it immediately (p+p will be £4.95)
Any trouble or questions please ask!
Stampin' Hugs for now,
 

Monday, 9 December 2013

Simple Six Sided Sampler cards with Oh Goodie!

Hello!
I have had the most lovely weekend, very relaxing with plenty of crafting (which I can share with you after Thursday!), perfect! 
But today I have a few simple one layer cards I made last week to send out with parcels.
I grabbed some (retired) notelets and my {very under-used} Six Sided Sampler stamp set to make these 3" x 3" cards in Smoky Slate and Crisp Cantaloupe.
The cute little sentiment is from the Oh Goodie! set which is actually in the main catalogue but also in the Autumn/Winter seasonal HERE teamed with the Goodie Gear treat bags and tags,
 Sentiment inside is also from the Six Sided Sampler set
 and I finished them with Coral Bakers Twine 
OK, I have a load more fun, crafty things to finish today so I'll be off for now :-)
Thanks for stopping by today
Stampin' Hugs,
 
Related Posts Plugin for WordPress, Blogger...