Showing posts with label Autumn/Winter Seasonal 2013. Show all posts

Sunday, 12 January 2014

Boy Monster Hugs with an Easy Punching Top Tip!!

Hello!
I promised I would be back today I'm actually managing to do that! Get me!! lol!
So, here is my third and final (for a while) Monster hugs card. I added a lightweight packet of sweets and this was fine, it didn't tip the card over at all :-))))
The background layer today was given texture with the Stylish Stripes embossing folder from the Autumn/Winter catalogue  *Reminder: This catalogue only runs 'till the end of the month! The same goes for the Monster Hugs and Valentines goodies (actually, these end the 27th January, see them all HERE)
So, here's today's card for you...
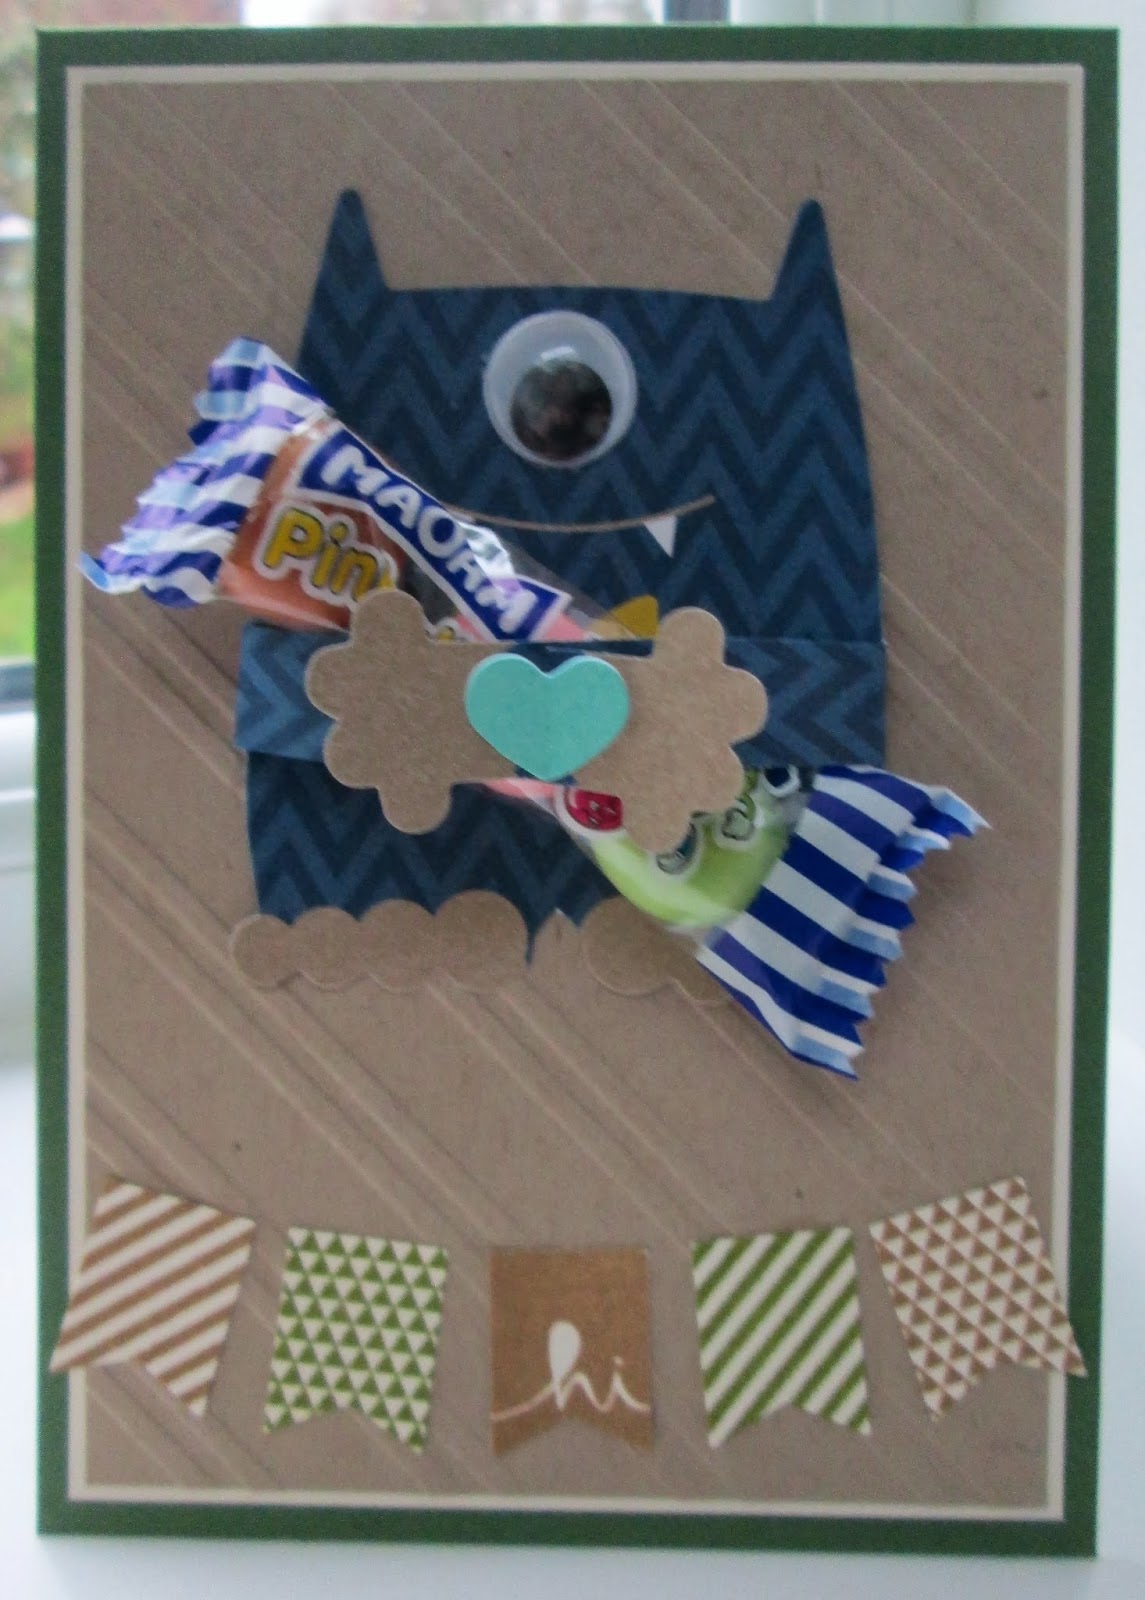
 Lil' Moster!
FREE Banner Blast stamp set (Sale-a-Bration sneak peek. This, the best promotion of the year starts 28th January '14!!) and a FREE matching punch will also be available.
Why not join my stamp club to get lots of FREE all year? See HERE for the details :-)
OK, so I know a lot of you probably already know this but when I shared it at a class a few weeks ago a couple of ladies didn't and loved how easy it made punching small scraps :-) This is for those blog readers who are still struggling with punching those small pieces of card :-)))))
So, who struggles with waste? Do you have lots of little bits of card you want to use and know you won't be able to punch them out when you've stamped on them 'cause they're too small? Or of course if you stamp an image an have to cut it down so it fits the correct way in the punch (that's ME!!) I did this with the banners this week to get the most form the card then I realised I had stamped them all the "wrong" way to punch them out ;-)
 then you have to try to line it up in the punch, realllyyy fiddly! If you can get it to line up at all that is!
 so, here's my Top Tip! Add the small piece of stamped card to the very corner of a post-it note (sticky note)...
and then you can guide it in and hold it in place much easier! All ready to punch!
OK, It's as simple as that. I really hope it helps someone out there reading this!?! Please do let me know...
Thanks as ever for stopping by today :-)
Stampin' hugs from me,
Products Used to create this project:

Saturday, 11 January 2014

Girly Monster Hugs and a Sneak Peek ;-)

Hello there,
I have a super sweet card today using more of the monster hugs, but today I'm using the ones for girls ;-))))
I really love these little darlings and they do make super quick cards. Oooh, hold that thought! Wouldn't they be perfect for making party invites too??!!
For this card I started with a Crisp Cantaloupe base with a Raspberry Ripple thin border around the Smoky Slate panel. The little flower I stamped all over the background using Versamark is from the up-coming Sale-a-Bration promotion (starting the 28th January) and is from the same set the banners are from, the super cute Banner Blast which also has a matching punch! Yay!! 
Message me before then to place your order or click on the links at the bottom of this post ;-)
So, here is the card I made...
To make these matching flowers I stamped extra banners onto spare vanilla card and punched them out with the Boho Flower Punch, they were layered using dimensionals and I added one of the Old Olive Simply Styled embellishments from the Autumn/Winter seasonal catalogue to the cross over of her arms.
 
 and a close up of the new Banner Blast stamps, I'm so happy there is a punch for these, loads of quick and easy banners coming up from me!
OK, that's me for tonight.
I'll be back tomorrow with another card using Monster Hugs with a Punching Top Tip!
Thanks for visiting tonight,
Stampin' hugs,
 
Products Used to create this project:

Thursday, 26 December 2013

Merry Christmas Belles and this years Christmas Day table :-)

Hellooo! 
Merry Christmas to you all, I hope you had a fab day with your nearest and dearest yesterday (and perhaps today too?). We had a lovely time with the Fam, chilling and plenty of eating, lol!
So, today I have the little gifts I made for my team to share with you today, these were wrapped in the "Pretty Packages" I shared with you HERE.
Now before I share them with you I have to give credit to my dear friend and fellow Jem, Kate Martin, she gifted me one of these at convention and I loved them so much I knew I wanted to make some myself, thanks Kate!
So, here are mine. I added my brooches to Deco Labels decorated with a blue and gold punched owl...
 all together :-)
 and a close up of the brooch part. 
I think they all got there gifts in time and hopefully they liked them? I have mine on my coat so I'm sure they will use theirs too :-)
 Now, I promised I would share my Christmas day table with you the other day, so here we go...
(the red on the cracker so didn't go with my theme but Zack wanted crackers this year ;-))
 left of the centre section.. I loved this little sledge as soon as I saw it ;-)
 the centre is a vintage style lemonade box filled with candles and curios, edged with a gorgeous laser cut Christmas place mat I cut in half and taped along each side,
 and to the right of the centre... 
look at my lovely little candle holders from my friend and downline Angela, thanks so much Angela, they looked stunning lit later in the day too xxx
Right, that's all for today!
Thanks for visiting and enjoy the rest of your Christmas holidays with your nearest and dearest :-))))
Stampin' Hugs,
Products Used to create this project:

Tuesday, 24 December 2013

Merry Christmas with Double O Holy Night Card Sharing :-)

Hello!!
Happy Christmas eve to you!!!!
I am sharing a double hit of Christmas card goodness today before prepping for tomorrows lunch hopefully with a bit of help (or hinderance) from the family?
So, I have a couple of cards I made a while back using O Holy Night in a traditional red (cherry cobbler) and green (old olive) colourway.
This first one uses the image twice and has highlights using the spotlight technique...
 White craft ink and Smoky Slate make the subtle background with all the images stamped onto Crumb Cake card. 1+1/4" and 1+3/8" circle punches make the highlight.
(all links at the end of this post)
 and a side view showing the layers :-)
 and here's the second card using a trio of the same image, this time I highlighted each sentiment using markers and a background created using Versamark
 and I popped some of the images up to highlight too :-)
OK, that's all from me for today.
I just want to take this chance to wish all my blog readers, customers, team and friends a 
Very Merry Christmas.
Thanks for your continued support this year and I look forward to sharing lots more with you over the next 12 months too :-)))))
Stampin' Hugs,
Products Used to create this project:

Related Posts Plugin for WordPress, Blogger...