Hi There,
I shared
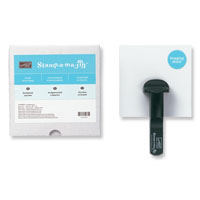
THIS CARD with you a couple of weeks back and have got a tutorial to share to get the most from your Think Happy stamp set and your Stamp-a-ma-Jig too!
I was thinking this might help some of the newer stampers out there in blogland or those who haven't used the SAMJ for a while. My class ladies found it useful so I wanted to share it here with you but I don't want you to think I'm trying to teach anyone how to "suck eggs" IYKWIM. If you already know how to SAMJ then please skip past this post for a card or two instead ;-)
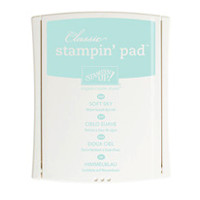
Here I have used Lost lagoon for the outline and Soft Sky for the inner swirls.
Now, some of my ladies at class stamped the inner, swirly section of the cloud first then the outside line with the SAMJ (stamp-a-ma-jig). when we did it this way round we found that there was a much higher likelihood of pressing too hard and getting ink from the centre of the cloud onto the image from the stamp...
So, lets start with the cloud outline
there is a top and bottom to this cloud so, as I have said before (
HERE), for this set I have marked the back of the stamp with a line at the bottom (ground) and an arrow pointing up (for the top)
*Note: If using wood mount I would also mark the wooden block with a top and bottom to the image*
Even with light tap, tap you get a lot of ink but press and lift and it will stamp your outline image perfectly.
I used Lost Lagoon for this part.
Now, ink up your swirly middle with Lost Lagoon ink. Yep, not Soft Sky yet as it's just too pale to see when you need line it up in a mo!
Position the window sheet in the corner of the handle, lock the block into the corner, slide down to stamp and slide back up
Now clean your stamp!
Top Tip: Put your Lost Lagoon ink pad away now, then you won't ink your stamp with the wrong colour!
get your Soft Sky pad open and ink your stamp, rest it on there while you do the next part if it's easier.
Note: I have also marked the top and bottom of this stamp to make life that bit easier!
Line up the swirly image on the window sheet with the cloud outline like so
place your SAMJ handle up to the edges of the sheet, careful not to move the sheet or place the handle on top of it either ;-)
Remove the sheet
Remember light Tap, Tap to ink, that's all you need on the new ink pads.
Plus double check your stamp is the right way up now too!
OK, this would be easier with an extra hand, remember one of mine is taking the pic but...
Lock in the block to the corner of the handle
Slide down and press, slide back up the handle. Don't be tempted to pull it away sideways as this smudges the image.
(this is why it's better to stamp the outline first then infill with the swirls, too much pressure on the outline stamp at this point made a mess of the image several times!)
and Voilà! Perfectly stamped clouds!
All three on this card are done!
OK, I'm sure plenty of you already know this but I hope this has helped some of the newer stampers out there?
Thanks for looking today,
Stampin' Hugs,
Products Used to create this project:

.JPG)
.JPG)
.JPG)
.JPG)






.JPG)
.JPG)
.JPG)
.JPG)
.JPG)
.JPG)
.JPG)
.JPG)
.JPG)
.JPG)
.JPG)
.JPG)
.JPG)
.JPG)
.JPG)


.JPG)
.JPG)
.JPG)
.JPG)
.JPG)