Showing posts with label Holiday Catalog. Show all posts

Tuesday, 10 November 2015

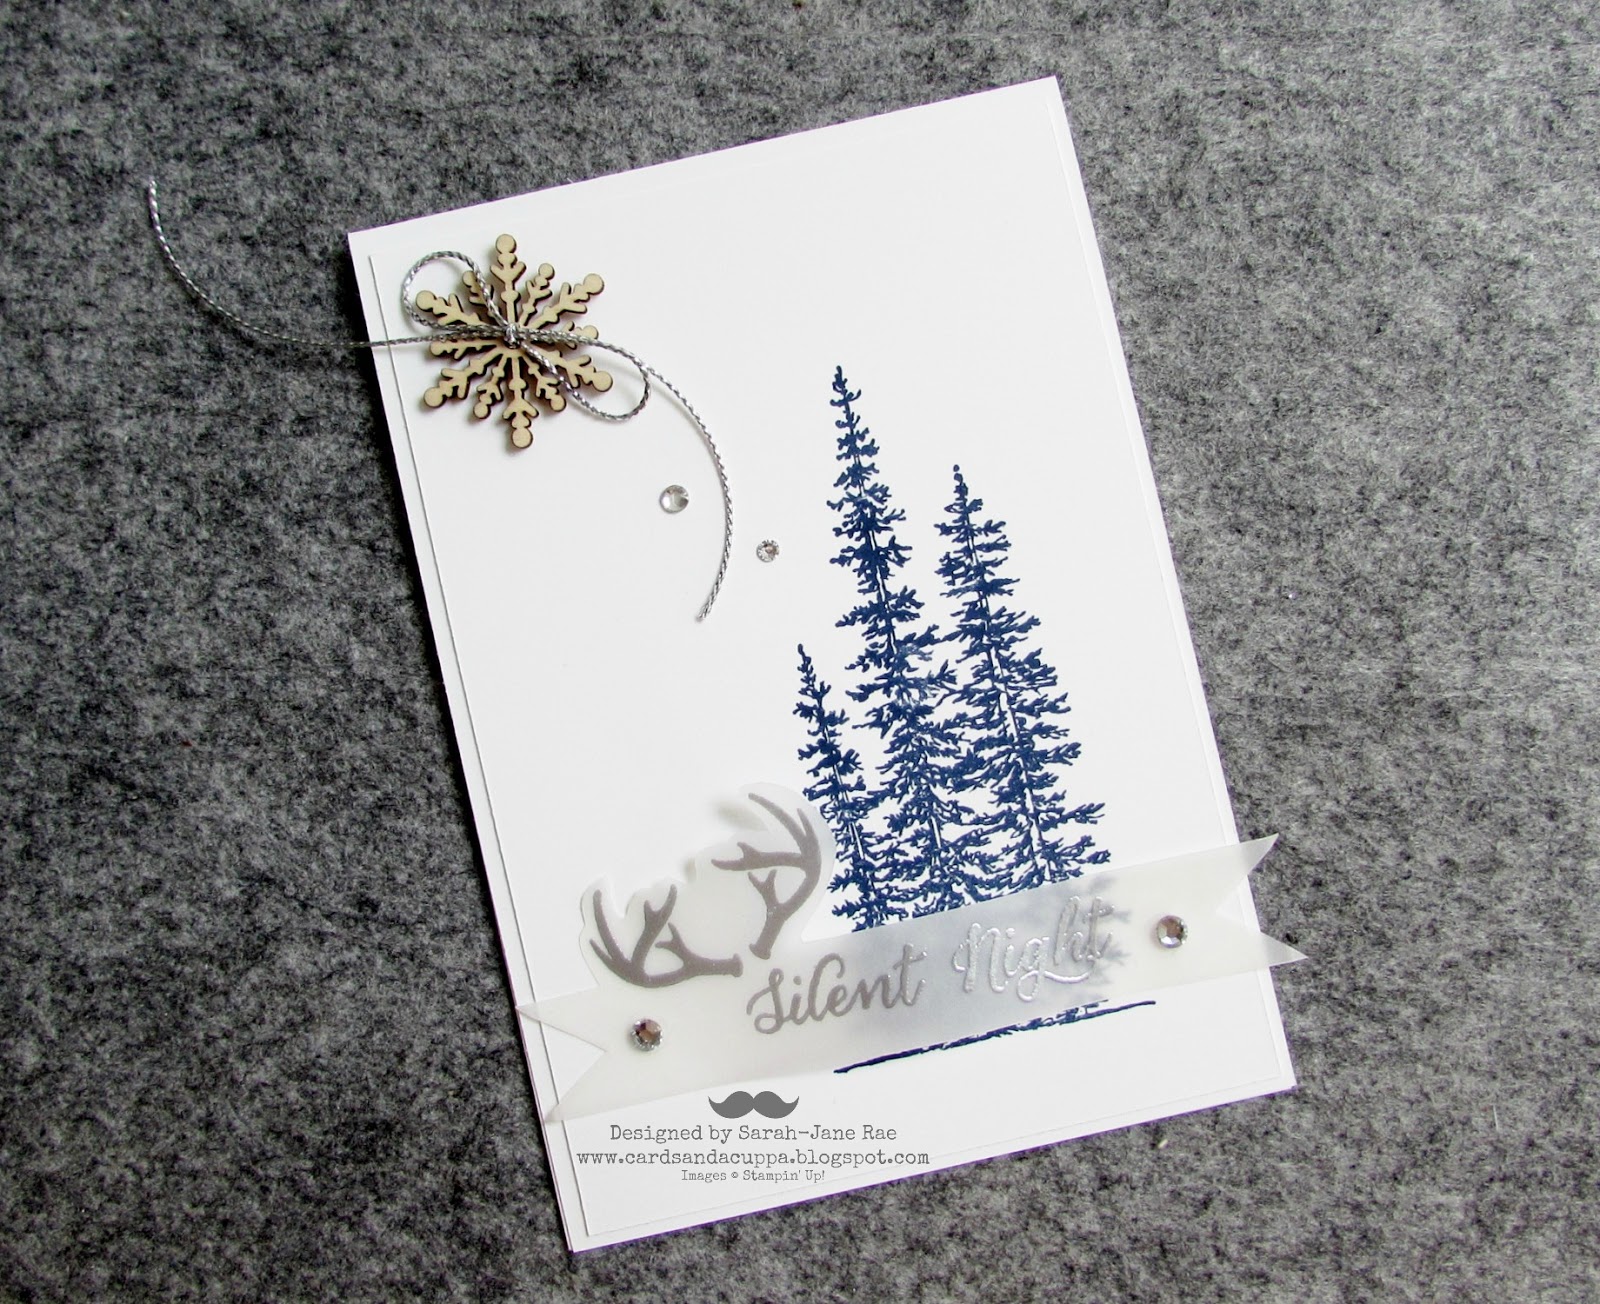
Navy and White Christmas Card using Stampin' up's Wonderland - a design started on last weeks video!

Hello there, 
Today I have a card for you that I started on a video on THIS POST last week, sharing how I attached these snowflakes and twine to your cards. 
I started this card front on the video and wanted to make something very different to the original and so this is the card I ended up making...
 A close up of the snowflake and twine
You can watch the video here
 I heat embossed the sentiment and the antlers (which I love and they seem to be everywhere right now! #bangontrend!) in silver on vellum.
 These trees are just lovely in navy, sprinkle with a few rhinestones and you're done!
I added the vellum with glue dots and topped each one with rhinestones to cover the adhesive
 and a top view to finish today.
Well, I hope you have liked todays card?
 If you would like to purchase any of the products used, please visit my shop.
And here is this months online orders hostess code
Stampin' Hugs,


Friday, 30 October 2015

7 Days of All Day Christmas Class Cards. Day 4: Flurry Of Wishes Embossed Snowflakes.

Hello,
and welcome to todays pair of cards! We have had a busy day here with check ups the dentist this morning and then pumpkin carving this afternoon with a whole heap of other things in between ;-)
So, I'd like to share todays cards. I think these might be my favourite card from this class... but, that could easily change by tomorrow of course! Let's see and of course you can let me know what you think too, in the comments...
 This pair of cards are very similar...
TIP 1: Stamp the sentiment first (in Marina Mist) then stamp the snowflakes around it.
 Stamp the snowflakes using Versamark and Heat emboss with white embossing powder.
TIP 2: Use a quarter sponge and a soft sky ink pad to gently build up the colour from the centre of each snowflake in a circular motion to make them pop on the matching coloured card.
TIP 3: Add the wooden snowflakes using the fine tip glue pen after you have completed everything else so you can leave it flat and give the glue a chance to dry.
 Finish by adding a few cream enamel dots from the Home For Christmas pack of dots.
TIP 4: This stamp set is available to purchase as a bundle with a matching punch (not used here), saving 15%!
OK, so I hope you like todays cards? 
Please don't forget to come back tomorrow and I'll be here with week 5 of my 12 Weeks Of Crafty Christmas Makes project - so it' a day off of this 7 Days of All Day Class Cards series.
'till tomorrow...
Stampin' Hugs,

Tuesday, 27 October 2015

7 Days of All Day Christmas Class Cards. Day 1: Home For Christmas DSP with a Tips Video for adding Twine and Snowflakes securely

Hello! 
And welcome to the start of my new series where I shall be showcasing 2 cards every day over the next week. The ladies made three cards of each style at this week's All Day Christmas Class and so I designed two similar versions of each card to inspire them. I will be sharing both designs each day for the next week with the exception of Saturday when I will have my regular 12 Weeks of Crafty Christmas Makes Project and Video!
I have a video today to go with this card and I have also got a couple more bonus videos for you over this coming week too. Its going to be a blast so I really hope you will join me for the next week?!
So lets get cracking! This super cute card has images from the Home For Christmas DSP as the focal point and an inked embossing folder in the background, so lets see...
 Here's a closer look at the deer version
 Babycham anyone? ;-)
 Love this sentiment from the Hostess only stamp set "Six Sayings".
 And the Christmas Tree version
 I added dots of gold glitter glue around the punched scalloped circle 
 Now, theses adorable wooden snowflakes and gold trim were included in the class and I have a very secure way to attach them to your card...
 ...And here's my quick tips video to show you exactly how I did it.
Feel free to "Pin" this picture so you can find the video easily in the future ;-)
A side view
 And one more picture to finish today
So, I really hope you've enjoyed today's post and I look forward to sharing another card with you tomorrow :-)
Thanks for looking today
Here is the Online Shoppers Code for use this October. Please use this code when shopping in my Online Store and spending between £25 and £150 for a free thank you gift after the end of the month. If you spend over £150 you will earn your own fabulous rewards :-)
ZNZFZYAN
Stampin' Hugs,
Products Used to create this project:
Related Posts Plugin for WordPress, Blogger...