Showing posts with label Scallop Circle Die. Show all posts

Thursday, 15 December 2011

All White Christmas Card

Hello today!
I have a few days of Christmas cards coming up so I hope you still have some to make! ;-)
This one is for a friend to send to a relative and I went with an all white colour combo for the first one,
Snowflakes stuck down and in 3d are made with the triple layer doily punch (page 117)
Scallop circle was edged with platinum shimmer paint and the DSP is from the Neutrals stack with the sentiment from Petit Pairs (page 83) such a lovely set of sentiments,
and an arty angle to show the dimension,
Well, I hope you enjoyed this card and I will be back tomorrow with some more Christmas yumminess :-)
Thanks for stopping by today,
Stampin' Hugs,

Thursday, 8 December 2011

Side Stepper card for a Baby

Hello,
Apologies for not blogging but I am just so crazy busy here, prepping for next weeks classes, getting ready for Christmas, blah de blah! How are your Christmas plans coming along??
Anyway a friend requested THREE baby cards this week, not a problem you say, but the minor complication with these cards were they were all for the same baby!! So I had to make three completely different cards ;-)
I will share them with you through the rest of the week but for today I have a stepper style card as my first offering ;-)
There is a full tutorial on how to make this shape card HERE, Main sentiment is backed with a die cut scallop circle, and the small scallop circle is cut using the Perfect Pennant Bigz die from the flirtatious papers,
Tags are from tiny tags ;-) and punched using the Jewellery tag punch, secured with a gem brad
and the rattle is from my new set Button Buddies, there is also a video tutorial for the bow HERE
Right, that's me off for today, I have lots of jobs still to do today but first I am going for coffee and cake with the girls, but I will be back soon! I hope you have a great day too,
Stampin' Hugs,

Sunday, 4 December 2011

Folded Tree Tutorial

Good day to you!
I have the tutorial today for the tree I showed you HERE.
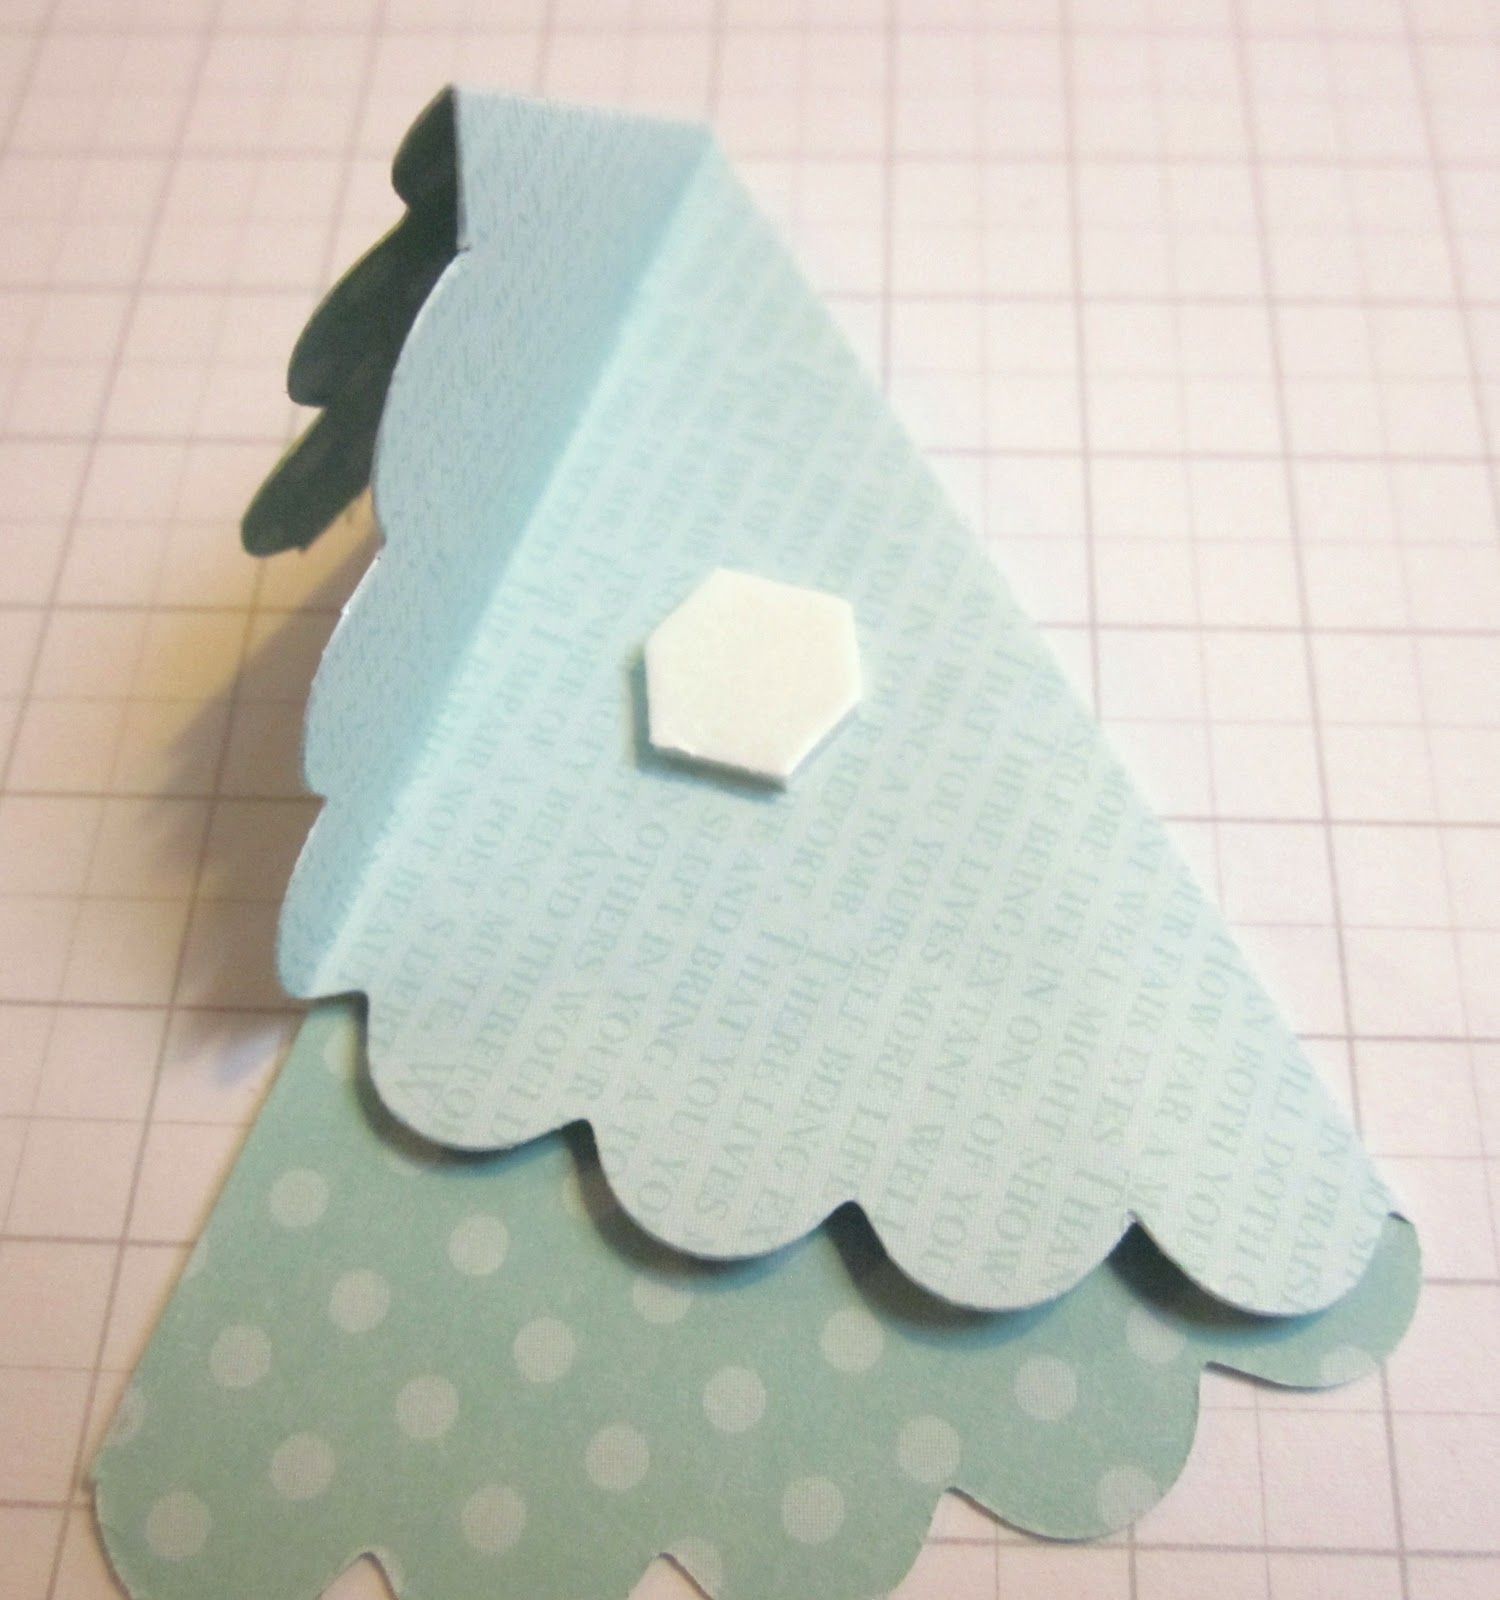
I wanted to design a folded tree that wouldn't overhang at the sides and this is what I came up with...
To make this you need limited supplies of a cutter, bone folder, adhesive, a pencil and ruler and I used Stampin' Up's Scallop Circle die with the Big Shot, but you could use a circle approx 10.5cm wide.
So, to begin with you need to cut your scallop circle in half, the easy way to find the centre is to gently fold in half and pinch at the top and bottom to mark, you need to do this at the lower point between the scallops,
Next, measure along the straight edge, again from the bottom of the scallop, to 3.4cm
Fold at this point ensuring the straight edges meet.
Next fold the smaller, top section towards yourself so the cut edge is parallel to the first crease.
Unfold the top folded pieces and then fold the lower larger section so the bottom cut edge runs along side the first crease.
Re-fold the top and that's it!
For the best look add dimensionals at the bottom edge of the scallops and add a dab of glue to the top point when you fold to secure.
Adhere to your card for a pretty Christmas feel, the pot was punched with the small tag punch and the background is stamped with Serene Snowflakes in Pool Party
Thanks for visiting today and I hope you have enjoyed this mini tutorial, if you have a go at making this I would love to see it :-)
Stampin' Hugs for today, 

Friday, 2 December 2011

Stampers Club card for November

Hello,
I have the card kit that my stampers 6 club received this month with their order. I send out a kit each month to these lovely ladies and then a mini tutorial to accompany it, if you would like to join my new stampers 6 starting in January message me now :-)
Anyway, the card. The colour inspiration came from a swap I received at convention from my SU! sister Angela, Pretty in Pink with Pool Party,
I stamped the snowflakes from Serene Snowflakes, they are so delicate
the sentiment is from Curly Cute
and the tree is made using just half a circle die cut with SU! scallop circle die, 
 Inked edges on the tree
So, I hope you like and I will be back tomorrow with a mini tutorial for folding the tree :-D
Stampin' Hugs for today,

Friday, 26 August 2011

More FREE gifts :-)

Hello,
I have some more Rich Razzleberry ribbon and mini clips for you today.
I have teamed this lovely colour with Marina Mist and Sahara Sand, I really like this colour combo and will definitely be using it a lot more,
I made this card for a friend using my flatter 3d flower. I really will post the tutorial for this on Sunday, I promise! It is all done, I just need to upload it but I have so much I want to show you it just keeps getting bumped!
I used the Marina Mist Designer Series Paper from the Subtles stack for this card. 
Curly Cute for the sentiment again, held onto a scallop circle die cut with a mini bulldog clip, also free this month, see HERE for more details.
I also added a few embossed butterflies made with the Beautiful Wings Embosslit, another SU! exclusive.
and a bit of pretty inside too
That's today's card for you, I hope you like?
Back tomorrow with my Simply Stampin' Challenge card
But don't forget there is still time to enter this weeks challenge :-)
Stampin' Hugs for today,

Thursday, 14 April 2011

Scallop Circle Easter treat

Hello!
I have been busy making Easter treat for the kids this week and thought I would share with you over the next few days some of the ideas I have had. This one (as the title suggests) was made using the new scallop circle die from SU! and the ever brilliant treat cups,
I stamped the So Saffron card all over using versamark and the cute bunny from "Little Additions" the punch art bunny was made with  the 1"circle and boho blossoms punches and stamped with the fine detail stamp from Baby Blossoms for some "fluffy" texture, 
I stamped Hoppy using Basic Phrases using my markers to miss the 'a' out and add the 'o' iykwim!
Easter was stamped using the Jumble Alphabet,
I used a Certainly Celery Scallop die cut for the reverse and stamped the same bunny all over that too, adding a scallop circle twist opening so the lucky finder (hubby?) will be able to get their eggs ;-)
{{sorry about the colour of this photo, I spent ages trying to get it right! tut!}}
Well, that's today's Easter treat, back tomorrow with another ready for the big hunt next week!
Stampin' Hugs,
Related Posts Plugin for WordPress, Blogger...